
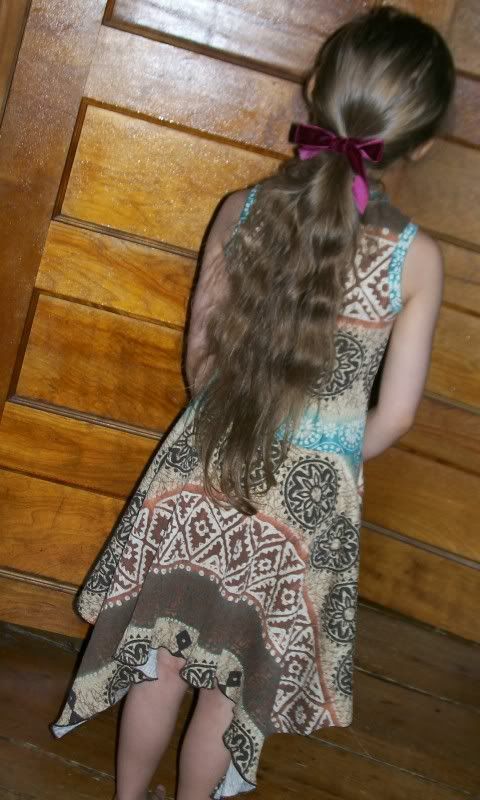
I am totally in love with the Handkerchief Dress I made last week...and so I decided to scale it down and try making a girls' version. If you can use a pattern and draw a straight line, you can do this, too. : )
 Since this is a relatively close fitting design, these instructions are strictly for knits. Don't try this with a woven...it won't work.
 Start with a purchased tank top or a tank top pattern. I used OttobreDesign's Free Kids' Tank Top Pattern and I have to say that it's the best pattern of its kind that I've ever tried. It may be time for me to start getting some Ottobre magazines.
If you're using a purchased tank top, cut off the hem. If you're sewing the top, put it all together, bind the armholes and neckline and don't hem.
For some kids, it looks nicer to start the skirt at the hipline, others at the waistline. You'll have to make the decision for what looks best and then cut off the shirt at that length. Keep in mind you'll need a seam allowance--I used 1/4".
Now, you must draft the skirt. You'll need tracing paper, a pencil, a ruler, a tape measure or a dressmaker's ruler.
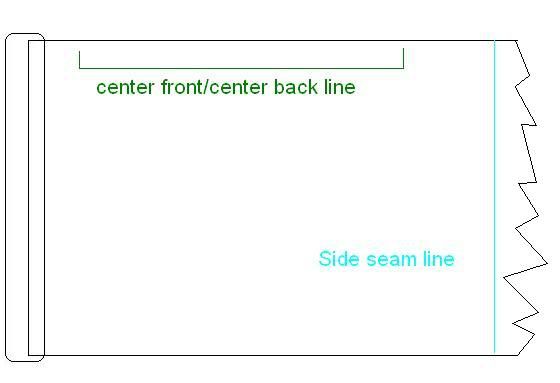
Draw a line perpendicular to the one edge of your tracing paper. This line is your side seam. The edge is your center front/center back folds. Label these edges in a way that will help you remember that the center edge gets cut on a fold.
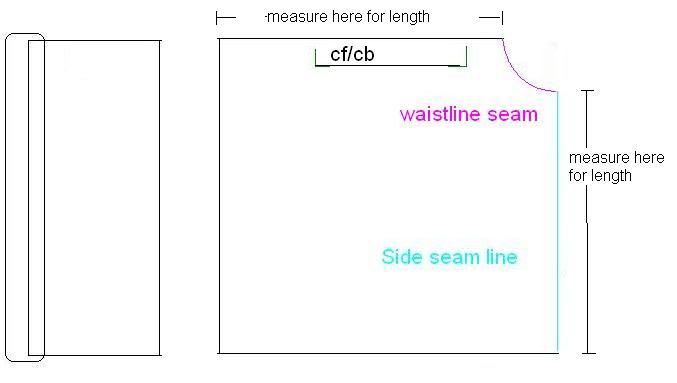
Next you must measure the bottom edge of the tank top. Just lay the top flat and use your ruler to measure and divide the resulting number by 2 -- this is how long the skirt opening needs to be on your pattern piece. For example, for mine the top was 10 inches from side seam to side seam, divided by 2 is 5.

Now, using dressmakers' ruler or your tape measure on its side, make a curve in the upper corner of your pattern piece that is the length of the above number -- in my case it was 5. The shape of this curve doesn't have to be super exact -- since this is done in knit it's pretty forgiving -- but as long as its looking something like a 1/4 circle it should work out fine.
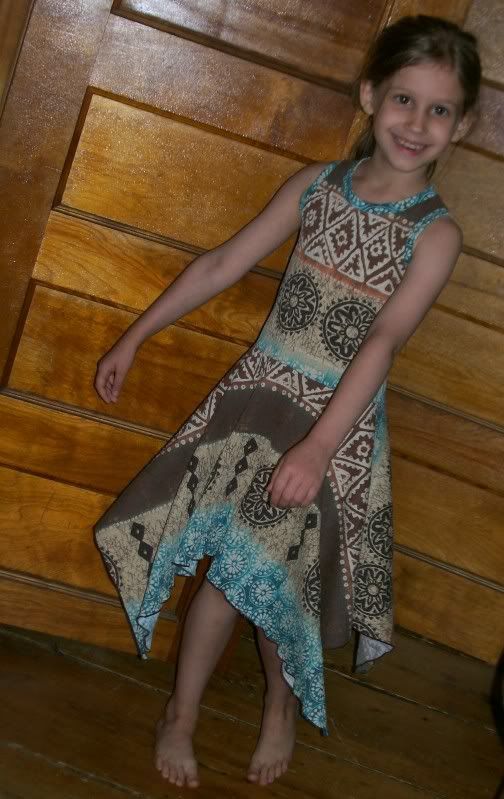
The same piece is used for both the front and the back skirt pieces. Your fabric should be folded lengthwise and the pattern placed on the fold where you've marked it. Cut out one for the front and one for the back. Stitch together the sides seams. Your resulting skirt should pretty much look like a square with a hole in the middle. Stitch the hole to the bottom edge of the tank top. Hem the skirt. And voila! Beautiful new dress. Very pretty.
That dress is really cute! I might try to make one for my almost 7 year old.
ReplyDeleteI hope you do. These dresses are so graceful and pretty. Please let me know if the instructions are unclear about anything and I'll fix it right up!
ReplyDeleteWhat a beautiful little girl! Cute dress! :-)
ReplyDeleteApproximately how much fabric does this dress use for a 7 year old? I plan on making the tank top.
ReplyDelete