Showing posts with label polyester. Show all posts

Monday, January 30, 2017

A New Blankie

All right then, let's get started.

This winter, I put alot of focus on knitting.  Just before I moved at the end of 2015, I found two balls of this Bernat yarn on clearance, so I bought them with no plan whatsoever what I would do with them.  I fell in love with the variegated earth tones in brick red, chocolate, cream, and blue, and this yarn is fluffy and spongy and just downright cuddly.

Bernat Blanket Yarn--Sailor's Delight

This past winter, I discovered this pattern of colors is still available.  Bought 2 more balls at Michael's. And I started knitting a blanket.

Let me state that I hate large knitting projects.  I almost never knit anything larger than a sock or a pair of gloves or a scarf or a hat.  I just don't.

But this yarn called me.  And I started knitting a blanket.  I don't know. Temporary insanity perhaps.

I started with 100 stitches on a circular needle.  I figure I'll make it in sections and then stitch them together.  That way I won't get discouraged with trying to maneuver a big, old clumsy afghan around in my chair.  I so I started on the biggest knitting project I've ever done. And the more I worked on it, the more I loved it.  It's so spongey.  And warm.  And cuddly.

So I bought another 4 balls of yarn on Amazon.  Because I wanted it to be a BIG blanket.  Permanent insanity.  I have no idea what possessed me.

But here it is. Judge for yourself.  Is it worth it?


Friday, May 23, 2014

Everything's Going Swimmingly

Hmmm.  I can't really make a joke to save my life, can I?

Here's the newest project: A pair of board shorts for Youngest Son.  Because we really want to be ready for summer swimming as soon as the water warms up.

The pattern is Kwik Sew 3430...one of the older ones that were still printed on heavy paper. I'm hoping I can use the pattern this year and next year yet, because after that I'll have to find a men's pattern for him.  Boy's patterns are so much easier to find than men's that I'm not looking forward to the treasure hunt.

Anyway, these are made from microfiber purchased from fabricfairy.com.  I only ordered 1/2 yard each of the print and the navy, not realizing how loooooong board shorts are.  So those navy design details at the hems of each leg?  Yeah, that's the extra length I needed for the pattern pieces.  If I'd checked the pattern envelope for yardage needed, I would've known.  I'm going to try not to make that mistake again. 

In any event, these went together pretty nicely with no problems.  Though I used 1 inch elastic for the waist instead of 2 pieces of 3/8 inch like the instructions call for.  You can't really see the front tabs where the lacing goes through because of the crazy print fabric, but they're there.

I think when I make these again, I'll sew 1 inch hems.  I think it would look better with deeper hems, but that's really the only thing I'd do differently.  We'll have to see how they work in the water before I can make a final judgement, though.

Sunday, November 10, 2013

More Toasty Toes -- Ballet Slippers

So apparently footwear is the name of the game these past couple of weeks.  First socks, now slippers.  These are pretty awesome slippers, though, and once your pattern is all set they take less than an hour to make. What could be better than that?

The pattern I got from the Burda Style website -- the Dorothy Ballerina slippers.  And it's free.  Unfortunately, they only come in one size so unless you're making a women's 8, you'll have to do some adjusting -- which isn't really that hard.  Especially if you use fleece, like I did.  The pattern is supposed to be for wovens, but since I never follow the rules, I didn't do that.

I made these for Daughter, so they're a girls size 1 1/2 or thereabouts.

To adjust the pattern, I printed out the pdf and had her stand on the sole pattern piece with her toes about 3/8" (for seam allowance) away from the front.  Then I traced around her heel to get the proper size for the sole.

For the upper, I cut out the pattern piece, laid it across the top of her foot (again leaving about 3/8" for seam allowance), and brought the ends around to the back of her foot and estimated how much to cut off so that it would fit snugly at the back but not be too tight.

All very unscientific, but it worked beautifully.  I made one quick muslin that fit perfectly from front to back, but I found that the sole piece was a bit too wide, so I narrowed that up a bit and cut out the pieces for the real version.

I made the soles in two layers: the inside is the fleece, for fuzzy warm coziness, and the outside is leather deerskin suede for non-slippiness and durability.  I got to break out my treadle machine for the leather sewing, Yippeee!!  I keep a leather needle in the treadle machine, as that is pretty much all I use it for these days.  I don't really have the space to keep it out all the time -- my regular machine sits on top of the closed treadle cabinet.

After stitching the center back seams of the uppers right sides together, I used the treadle to stitch the soles to the uppers.  Then, going back to my regular machine, I zigzagged a piece of 1/4" elastic to the foot opening stretching ever so slightly.  Then I folded over to the inside and zigzagged again, for a nice clean finish around the foot opening.  Voila!  All done.  That's why it takes less than an hour.  There's just not much to it.

The first pair I made of these was done in a brown fleece with these ugly flowers embroidered on in wool yarn.  Not sure why I bought that piece, except that maybe it was really cheap.  The funny thing is, Daughter really liked the slippers, so she didn't mind the ugly flowers until I could make her a better pair.  Preferably in pink.  I didn't have any pink fleece, so we compromised with blue for the time being.  So here's the blue pair.  I'm sure she'll be happy to model them later.

Friday, September 13, 2013

I Love Getting Fabric in the Mail

This is my first fabric order in a really long time.  I haven't done much sewing lately, so I really couldn't justify any fabric purchases.  But now that I'm sewing again...well...I just couldn't resist.  I got all these from Fabric.com, of course.  They're easily my favorite place to go for fabric.


This one is for my husband -- I'm going to make him a long sleeved button down shirt.  It's a silk/linen blend that arrived a little stiff, but should soften up when it's washed.  It's actually much nicer than it looks in the picture.


This is another fabric I was thinking might work for my husband, too, but the checks might be too small for his taste.  The pattern is woven into the fabric, so it's textured, too.  A very cool piece.  If he doesn't like it, I'm going to snatch it for myself.


This one is a stretch lace that I'd like to use to make a cardigan for myself.  I got this is two different gray colors, but they're so similar it's hard to tell.  I also got a piece in a peachy color for Daughter, thinking she might like a pretty cardigan or scarf herself.  No worries.  She does :o)


And the last is two pieces (I got pieces from two different manufacturers to see which was better -- they're both pretty good) of royal blue broadcloth.  Because Youngest Son looks great in blue.  It's definitely his color, and he needs a few button down shirts.


Now I just have to work on my Mini Wardrobe.  I'm making slow progress, but progress all the same.


Tuesday, January 29, 2013

OPML Contest -- Fourth Dress is Spanish Holiday


This dress is made with the pure, unadorned pattern.  I'm counting on the print fabric itself to make this particular incarnation unique.  It's another polyester onion skin, also bought from Fabric.com.


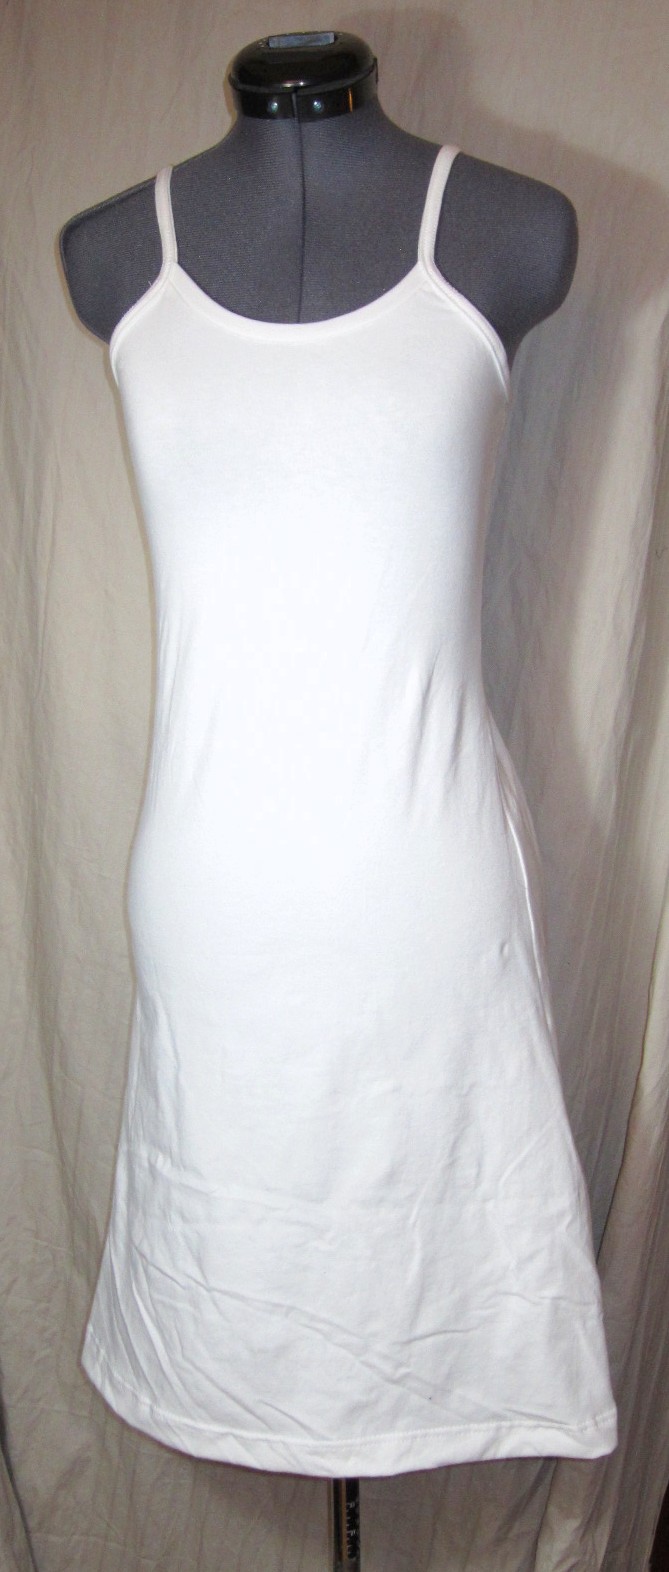
I made a cotton knit underdress to wear with this dress and the Victorian Rose one.  I've already made a pattern for it, though the original was intended to have crossed straps to go under a racerback tank top dress.  I can't cross the straps on this underdress because the neckline of these onionskin dresses is too wide and they would show.  I wish I would have made the straps just a tiny bit longer, as the neckline at the center front sits just behind the neckline of the top dresses.  It doesn't show, so I guess it really doesn't matter.

Now I have just to sew together the wool jersey dress, and I will have finished my entry for the contest:  the black LBD, the Victorian Rose, the Spanish Holiday, the black and red print, and the wool jersey.   If I have time, I want to make yet another color-blocked dress in a black and white print.  But the end of the contest is in two days and I don't think I'm going to make it.

Sunday, January 27, 2013

OPML Contest -- Third Dress is Victorian Rose

Here's dress number three.  The fabric is a polyester onion skin from Fabric.com.  I've never sewn (or worn, for that matter) onion skin before -- one of the reasons I bought it was that I wanted to try sewing a fabric that I've heard so many people  talking about. 

I don't like polyester in general.  I don't really like the way it feels against my skin, and it usually makes me feel pretty hot.  But I thought I'd give it a try anyway.  I can definitely understand why people like it, and if I traveled more, I would be more fond of it.  You can fold it up tiny, it doesn't wrinkle very much, and I bet it would dry lightning fast after washing it in the hotel bathroom.

The fabric is a dream to sew, no doubt about it.  It wasn't that fun to cut out, though.  My rotary cutter went through cotton jersey like a hot knife through butter, but when it came to this stuff, there were always threads that somehow didn't get cut.  Trying. Very trying.  I almost lost my temper a few times.

When all's said and done, I got the dress cut and assembled and it only took around a hour.  Truth is, though,  I'm not sure about it.  I like the color--though pink is really not a color that I like very much on myself.  I really like the print, but I think it would suit me more if it was a darker or duskier pink.  And I like the concept of lace sleeves, but I'm not sure that the ivory lace is quite appropriate, even though it goes beautifully with the print.  What I'm really not sure about is that the look isn't just a little too "young" for me.

Let me say here that I've never liked the concept of "dress your age."  What is that supposed to mean?  What does "dressing like 40" look like?  And who gets to decide?  And why?

On the other hand, I don't want to dress like I've just raided my 20 year old daughter's closet.  Because I am old enough to have one (my oldest is a son and he's 22).  And let's face it.  There are some clothes that look fabulous on a twenty something that look downright ridiculous on a forty something.

So this dress is by no means a failure -- I like it too much for that.  I'm just not sure it's for me.  I'll ask you all what you think once I've had a chance to try it on.  I need to make a white slip before I can do that, since the fabric is pretty sheer.  It's not obvious in this picture, but you can pretty much see clear through this baby.

Tuesday, January 15, 2013

New Fabric, New Inspiration

It's been a long couple of weeks, and while I have done a bit of sewing, been just too tired to do much blogging.  I've got a sweater to show you, Youngest Son's wool suiting vest, and a franken-version of the HotPatterns All Wrapped Up tank top.  As soon as I can arrange a photo session I've have them up for your jolly amusement.

As for the scoopneck top, thanks to all of you who commented, and I think I've decided to keep a couple of them, but get rid of the rest.  After all, eight versions of one pattern?  Kinda silly and shows a lack of imagination, dontcha think?  Of course, what I'm going to replace them with, I just don't know.

So to help me with my decision making I did hat every good fabric stasher does.

I went shopping.

Fabric.com is usually my go-to place for most fabrics, and they usually don't let me down.  They've got lots of onion skin right now, and while I've never sewn it before and I generally don't wear polyester, I liked a couple of the prints so much that I thought I'd give 'em a try.


I'm not a pink person usually.  But I like this print.  that Victorian swirl thing always catches my eye.


This one says beige and indigo in the description, but I confess I don't see much indigo here. Perhaps it'll will show up in real life on the doorstep.  I like this print alot, though I'm not sure what to do with it. It might be too much for a dress but I won't know for sure until I have it in my hands or draped over a shoulder.  Fabric looks so different than you might think sometimes.


And this last one is not onion skin, just a light weight polyester.  I figured in for a penny, in for a pound.  If I'm going to buy polyester I might as well go all the way.  I'm fond of black and white, so even if this turns out to be unsuitable for a dress or a top, I'm sure I'll use it for something.


And that's my order, hopefully arriving at the end of this week.  I small order for me, only 9 yards all together.  But since I'm not doing that much sewing, I can't really justify buying more fabric.  The only reason I got these is that I really do need to replace those scoopneck tops that I've retired.  Really.

That's my story and I'm sticking to it.

Sunday, December 9, 2012

Girl's Burda Coat -- Nearly Finished Sneak Peek

This has been fun.  I've never made a jacket like this: so complicated and so cute!

And since Burda's instructions are so delightfully sparse, I've had to puzzle out alot of things in the assembly process.  Which has been challenging.  Which means I really enjoyed myself.

The first challenge: getting the not-quite-real piping to go smoothly around the curved pocket flaps.  It's not quite real because it doesn't have any cord inside.  Do you still call it piping if it doesn't have cord?  And if not, what do you call it?

Because I'm using wool, I could press it all I wanted.  I discovered that if I sewed it to the one pocket flap piece, I could press it to death to make it lie flat enough to attach the other pocket flap piece smoothly.  Nice.


The other tricky part was the pocket openings.  Since the pockets are in a seam, it should have been easy, but somehow I just could not wrap my brain around how to do it at first.  Took me several tries, but I finally got those babies in.  The waist seam piping is a little less than perfect because of the difficulty I had, but it still looks pretty good.

The other, other tricky part was those darn two-piece sleeves.  It wasn't until I sewed them in, accepted that I was never going to get the notches at the sleeve cap lined up just right, and bound the seams that I realized the underarm-ish seam of the sleeve was not supposed to match the side seam.  Duh!  My excuse there is that I have little experience with two-piece sleeves.  I know better now.  Took me two hours to rip off the binding of both sleeves and redo both seams.  Serves me right for being dumb.

The lining went together pretty easily.  Daughter picked this spruce color, which has absolutely nothing to do with the colors of the coat but seems to go with it well enough.


In any event, it's all assembled.  The neckline seam has not yet been trimmed and notched, the hems aren't in, I haven't done the buttonholes and buttons yet, and it hasn't been pressed.  But here's a sneak peek of what it looks like.  I don't have a good display dummy for Daughter's size, so you'll have to wait to see the whole thing in all it's glory until it's done and I can take Daughter out to get some fun pics around town.  Could be a few days, but you'll just have to wait :o)


Sunday, February 12, 2012

Men's Vest

I got the pieces for my Second Son's vest cut out and interfaced last night.  The brown is tropical weight wool and the lining is a poly brocade shirting.  It's a pretty neat fabric -- either side could be the right side.  I chose to use the side that emphasized the leaves the most as the right side.

He's asked for one inside pocket and one outside pocket.  The inside one will be a plain welt pocket -- that's what I did on his last one and it seemed to work out just fine for him.  I will interface the lining all around the pocket area this time, which I didn't do last time.


He's also asked me to add a belt in the back with a vest buckle so he can adjust the fit to his liking.  I have vest buckles in nickel and brass -- this chocolate color will look better with brass buckles, I think.

I'd like to get at least the darts sewn today, and if I can get to more than that, I'll consider it a bonus.  I'd also like to get a picture taken of Oldest Son in his new dress shirt so I can post it to Pattern Review and get my entry for the Menswear Contest taken care of.

Wednesday, September 21, 2011

A New Sleeve Board and Other Goodies

I went to Joann's yesterday and picked myself up a sleeve board to replace the one I smashed to smithereens (okay, okay I just broke it in half) over the weekend.  Lo and behold, the ones at Joann's are now made with steel mesh like a regular ironing board, as though daring me to try and break this one.  Ha!  Ten bucks says I can find a way to break steel mesh  :-)

More surprising was my fabulous Red Tag find.  Red Tags are 50% off this week, and I've been known to find some really great pieces for, um, really cheap.  So, I scoured the Red Tag rack yesterday and found this:

The label said 64% polyester, 29% wool, 7% other.  Um, wow.  29% wool fabric at Joann's?  My Joann's rarely carries anything in silk or wool or any of the other finer fibres.  So, I snatched it up.  I took the rest of the bolt--only 3.5 yards or so, but plenty for me to make pretty much whatever I want.  It was $10 a yard--at 50% off it was $5 a yard.  It feels really soft and the rayon embroidery is a little subtler than the picture--you know how rayon catches the light.  And I like the embroidery because it's more like vines and leaves and less like flowers--I'm not that much of a flowery kind of gal, but vines and leaves suit me just fine.

Butterick Patterns are also 99 cents this week, so I got a handful of new patterns, too.  I'm going to use this fabric to make Butterick 5685.

But not until I get a chance to make that Shining Star Vest, darnit.  Practical. Sewing. Keeps. Getting. In. My. Way.


I also got some pin cord, linen, lightweight twill, and rayon challis to make shirts for my sons and husband...but those are boring and I won't go into them  :-)

Sunday, September 11, 2011

Progress on the Peasant Top and Shining Star Vest

Well, I've definitely decided on the Shining Star Vest, though mine will definitely be sans ruffles.  I looked at the actual pattern for the first time and it was pretty cool to note that it's got a couple more pattern pieces than I expected--there are separate pattern pieces for the lining because the pattern includes a fashion fabric facing--something that's been missing with the other vest patterns I've sewn.


Suede cloths on the left, linings on the right
I'm going to make it in this tan colored embroidered suede cloth--very rustic and classy at the same time.  Do those two adjectives go together? Not sure. :-) I'm also not sure there's enough of the tan to make the whole vest--I may have to make the back out of the green suede cloth.  That's not my first design choice, but I'm willing to go with it.


I haven't picked a lining yet, but it's going to be one of those in the pic--they're all crinkly, shimmery polyester stuff that will make the perfect lining.  I'm leaning heavily on the spruce, but I haven't made a commitment yet.  The red or the brown actually matches better, but  I used the green to line a pair of wool pants last winter and it handled beautifully and is surprisingly comfortable to wear.

I've got the pattern scotch taped together and cut out in the size 6--I've only got to finish its companion peasant top before I'm ready to begin.  I fully intend to make a muslin of this one first, though.  I usually have to do a bit a fitting adjustments to anything with a princess seam.  I haven't saved this fabric all this time just to mess it up.  :-o

Speaking of the peasant top, I've decided to use the hazelnut cotton/silk voile.  This stuff feels like heaven against your skin, it's so airy and smooth.  It was a little tricky cutting the pattern pieces out--the fabric wanted to really slide around and go off-grain on the table.  I considered starching it to make it a little more easy to handle, but since there's only 3 pattern pieces and they're pretty basic, I just decided to use a bright light (sunlight, actually, yesterday morning) and keep a close eye on the grainline.  It all went swimmingly until the sun went behind a cloud--my artificial lighting wasn't nearly as good--but I got the job done and the pieces are laid out, all ready to sew.

Wednesday, August 31, 2011

Fringe Festival Top -- Finished


Well, it was a long time in coming, but I finally finished the HotPatterns Fringe Festival Top which is a free download from Fabric.com.  Of course mine is sans fringes, since me and fringes just don't get along, but everything else is just as drafted.

The fabric is a painted poly knit that I got a couple of years ago at Joann's--I love the print even though I don't generally love polyester.  I do wish I had chosen a better layout--I don't like the stripe that ended up as the center front.

The pattern is easy to cut--it only has three pieces: the front, the back, and the collar/tie.  The instructions are pretty simple, too.  Sew the center front seam, then the center back seam, then the shoulder seams etc. etc.  A beginner could easily put this pattern together.  There's not a ton of fitting issues involved in a loose fitting tunic tee and the tie collar is kind of neat.

I used the blind hem stitch on my sewing machine to hem the tie edges -- it made that cool scalloped edge that you see from time to time.  I'm going to do that again on something lightweight and airy--I really liked the way it turned out.

I didn't really have any trouble with anything on this top--with the sole exception that there wasn't nearly enough hem allowance to make a 1" hem on the armholes.  I had to content myself with a 1/2" hem--I'm guessing no one will ever notice  :-)

I did put a bar tack on each side where the collar ties split off from the front neckline--not at all easy on a stretchy knit.  I really should have used stabilizer, but it came out just fine without it.  The tie seems more secure with the extra reinforcement and it's less likely that I would tear the fabric at that seam.  I can be pretty hard on my clothes sometimes--especially stuff that ties.  I also didn't stitch the center front seam all the way to the edge--I sewed only up to the neckline hem allowance.  This made it easy to sew the hem of the V nice and flat and crisp.

Other than that, everything went completely as planned.  It took almost exactly one hour from fabric layout, to cutting, to construction, to hemming.  A nice afternoon project that's pretty stress-free.

I'm going to confess, though, I'm just not sure how I feel about this top.  Maybe the fabric I chose just wasn't quite right or something, because while I don't dislike the finished product, I don't love it either. What do you guys think?

Tuesday, July 19, 2011

All Wrapped Up -- Tank Top Finished

Sadly, a picture of a black shirt just doesn't show much
With a little consideration, I finally decided on a fabric for my Hot Patterns Tank Top--a poly jersey that I got earlier this summer from Fabric.com.  I chose this fabric for a couple of reasons: it would be pretty easy to sew, would look good if I decided to skip hemming, and while I liked it, I didn't love it, so it wouldn't be a heartbreaking loss if it ended up as a total disaster.

The assembly of the pattern was pretty straightforward--though I do wish HotPatterns set their downloads up so that the resulting pattern sheet (after taping all 25 sheets of printer paper together) was in the shape of a square, rather than, well, not a square.  It helps that the papers were numbered and there was an assembly diagram.  But still.

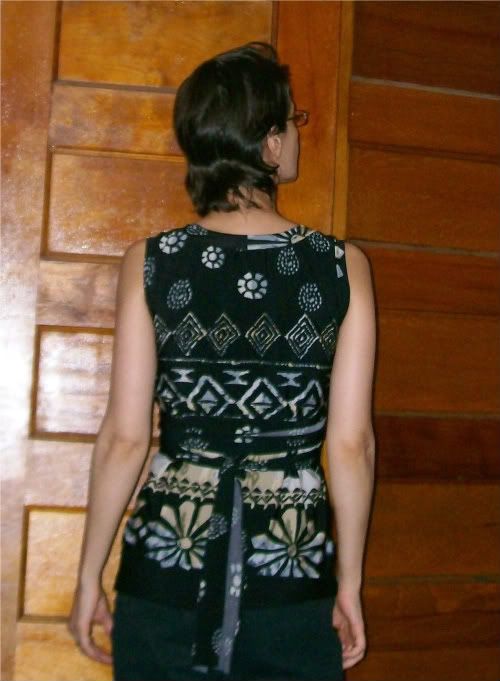
Cutting was also pretty straightforward--the only trick for me was matching up the border print at the side seams.  There are only a half dozen pattern pieces--front, back, front overlap, arm binding, neckline binding, and ties.  The ties, however, are longer than what fits on a standard knit fabric width folded in half--the size 6 is 42 inches long--so they have to be cut separately.  Frankly, I found the ties to be too long and I cut mine to the length that I preferred.

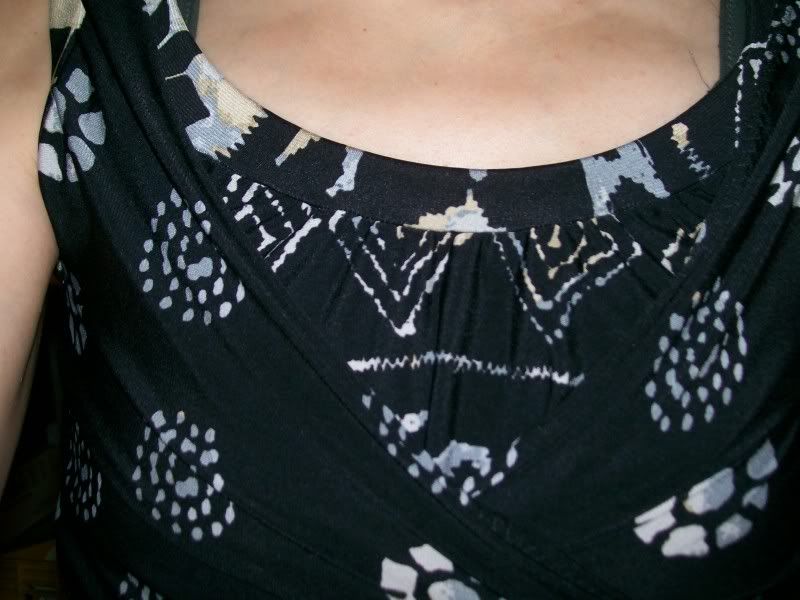
Shirt appears gathered into neckline binding
Click the pic to see it better
Assembly was pretty straightforward as well.  My fabric didn't quite match the stretch guidelines--since the border print ran along one selvedge, the direction of the most stretch runs vertically instead of horizontally--but it's close enough to work.  The main trouble I had was with the neckline binding--the main body of the shirt managed to look almost gathered by the time I was done attaching the binding.  This also kind of worked out.  Even gathered-looking, it still looks kinda nice and besides, the front overlap conceals most of that part of the shirt anyway.

The armhole binding fit spot on and I had no trouble with those.  But they are very, very close fitting.  I find mine almost uncomfortable--in another fabric or in hot and humid weather I could see this close cut fit as being pretty unpleasant to wear.  In another version of this top I will definitely cut the armscyes bigger.  I like a close fit, but this is too close.


All in all, this is a nice pattern.    I constructed this top entirely with my sewing machine and a zigzag stitch.  Even the hems are done in 3 step zigzag.  I assembled the printed pages, cut fabric, and stitched the entire thing in a single afternoon.  Not bad for a free pattern.  Oh, and it's cute, too!

Sunday, May 1, 2011

Who Doesn't Need A Million Button Down Shirts?


Back to basics, wardrobe staple--whatever you call it, everyone has at least one of these.  This shirt is made from a rayon/poly/lycra stretch woven with a subtle floral flocked pattern.  This fabric was a dream to sew and is incredibly comfortable to wear.  The buttons are mother of pearl with laser cut designs in deep black. The pattern is Jalie 2322.  If you've never used a Jalie pattern, I highly recommend them--they cost more than Simplicity or  McCall's on sale, but they come on heavyweight paper.  They'll need to be traced, but the wide variety of sizes--22 in each envelope--makes custom fitting considerably easier than usual.  The techniques for sewing button down shirts for either men or women are essential to the dressmaker--photo tutorials coming soon!

Assymetrical Front Close Vest


This is a really nice vest that is so perfect to wear to the office, and the assymetrical front closure is more interesting that the ordinary one.  This is made in a heavyweight poly/rayon/lycra jacquard--the outside is black and charcoal and the lining is the same fabric in black on black.  The zigzag pattern is composed of surprisingly detailed ferns. Normally I wouldn't recommend using a fashion fabric of this weight as a lining, but I specifically chose this to make to vest heavy and substantial.  The pattern is New Look 6659.