Showing posts with label outerwear. Show all posts

Monday, January 6, 2014

Last Year's Project -- Wool Knit Gloves

I have a number of projects that I finished at the end of 2013 --  and never got around to blogging about.  I'm going to try and catch up one project at a time, especially since my current projects are quilts.  And of course, those can take a really long time from start to finish.  At least they do for me.

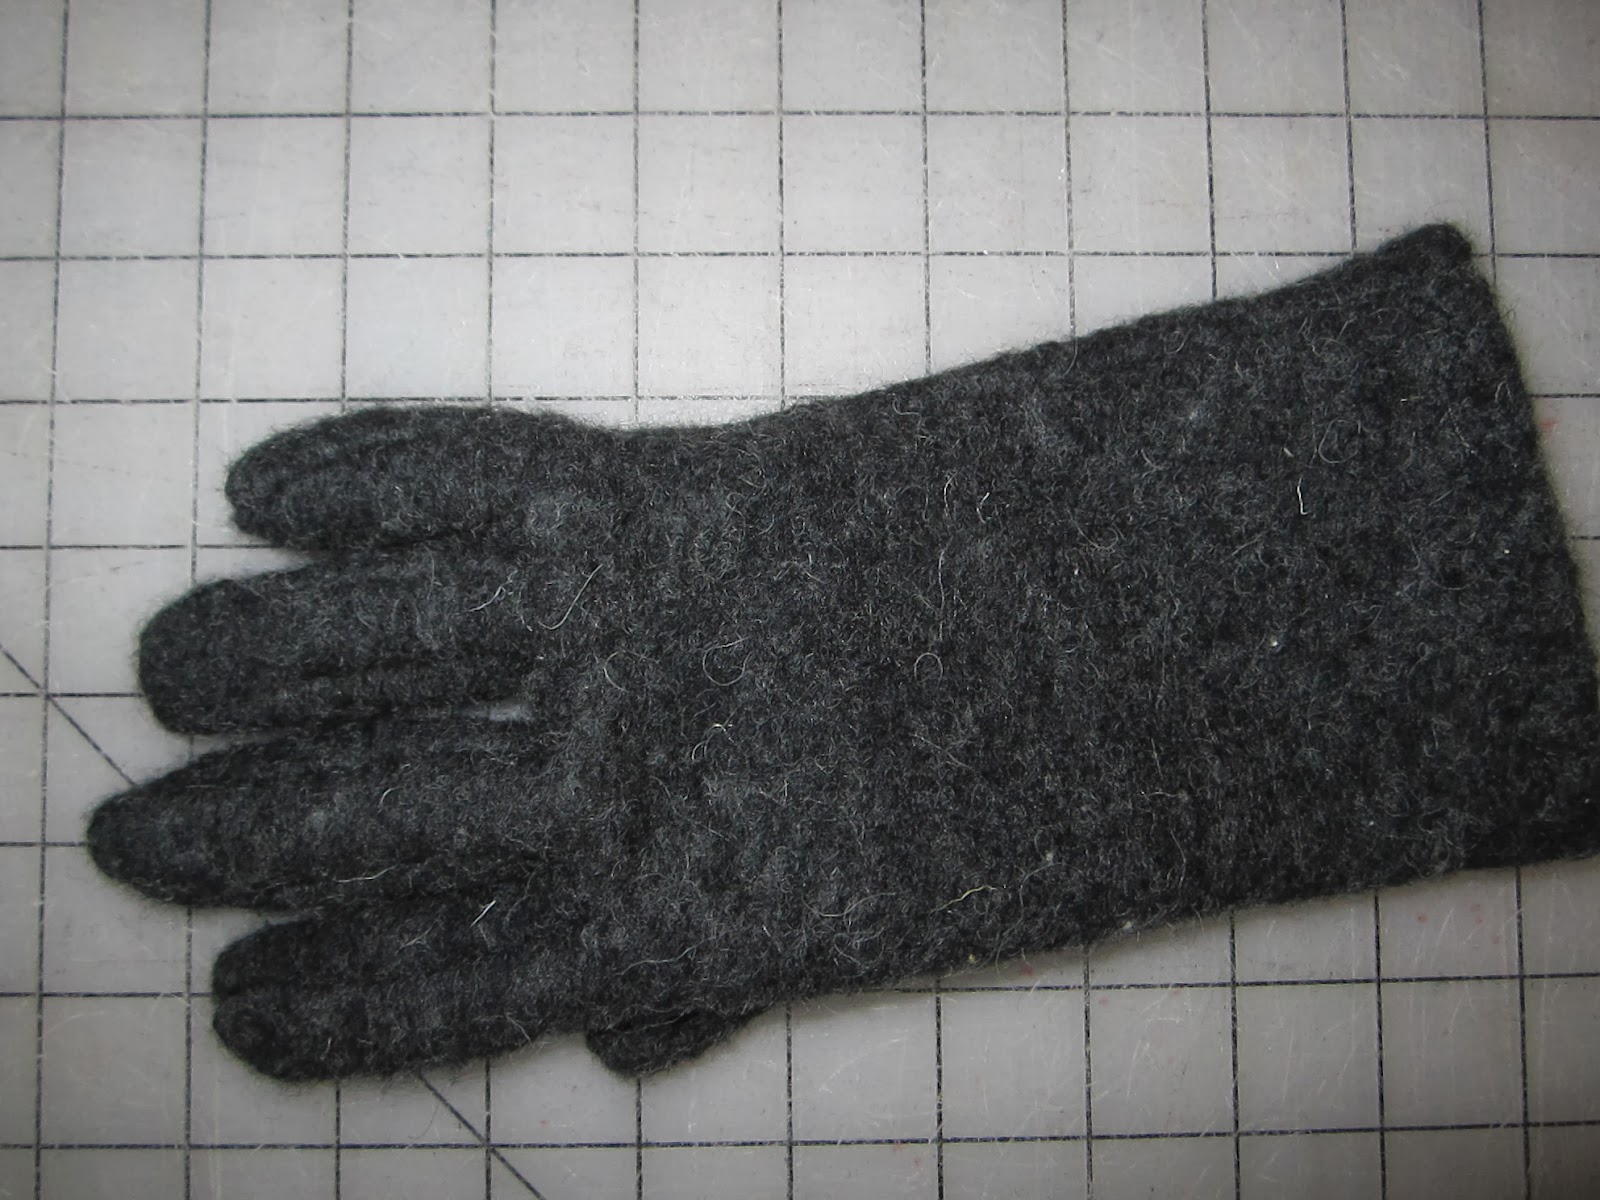
First up: these wool knit gloves.  Youngest Son has big hands, but short fingers.  Which means that he can't even slip his hand into a boys' size glove, and the fingers of men's gloves are just too long.

So I figured it was about time a took a serious look at Butterick 5370.  These are from their Making History, um, historical collection.  I made Green Pepper's fingerless glove pattern a few years ago and found glove making an interesting challenge, but this Butterick pattern was the first one I came across for gloves with the actual entire fingers.  I had to have it, if only to adapt the Green Pepper fingerless pattern to a full finger pattern.  I noticed from their website (just now, as a matter of fact) that they, too, have a  full-finger glove pattern -- Note to self: get that one ASAP.

Turns out that such radical alterations weren't needed.  The Butterick glove pattern runs from a 7" hand to 9" hand, 1/2" inch larger than the Green Pepper.


I started out with the smallest size, thinking to just test the pattern and the construction challenges.  And when I say challenges, I mean challenges.  The most significant being 1/8 inch seam allowances.  Getting your fingers close enough to the needle to work with seam allowances that tiny is not for the faint of heart.

The next interesting part is the crazy pattern pieces.  I kid you not.  I am in awe of whichever genius however many hundred years ago dreamed up this system of hand coverings.

For those of you who've never seen a glove pattern before, here you go:

The top left piece is the thumb pattern.  It is folded in half and stitched along the top portion.  It is then sewn into the main piece (bottom right) into the hole you see cut out there.  That's right. It is sewn in circular sleeve style.  Very cool.  The bottom left pieces are the finger gussets -- those are the pieces that attach the top of the fingers to the bottoms (the palm side, so to speak) and each of them are a different length.  They definitely have to be matched perfectly, there is little room for error.

I started my sample glove using a heavy weight wool knit that I bought years ago.  It has a really strange surface, almost like melton, but very hairy and very stretchy.  I don't remember why I bought it (I'm sure I had a reason) and I almost didn't keep it (internet shopping can be so ... entertaining sometimes, and this piece was so not what I was expecting) but I hate to give up any piece of wool that comes my way.  Especially a wool knit.  Even if it is a little strange.

The fabric is thick, stretchy, and wool.  Sounds like gloves to me.

Cutting out the pieces accurately was the next challenge.  The fabric has such a springy surface that the pieces just did not want to hold still.  My pattern weights we too big for the gusset pieces (as you can see, they're not even an inch wide) and not heavy enough to really hold the pieces down properly.  I managed somehow (obviously) and got the first sample glove cut out.

Surprisingly, the instructions were rather straightforward and not that hard to follow (of course I've done this before with Green Pepper, so that probably gives me an advantage).  And like most of Butterick's instructions, I only followed most of them.  I didn't like their fingertip sewing technique -- it always seems like Butterick makes things more difficult to construct than they need to be.  I always read all the way through their instructions first, and take notes where I'm going to do my own thing.


Specifically, I attached the gussets to the top of the glove first, and then stitched the gusset to the bottom of the glove, stitching the two fingertip portions together, and then stitched down the next finger (after checking for the next finger's gusset alignment, of course).  Sound confusing?  It is.  Butterick's way was worse.  They had you stitch the fingertip portions together and then try to sew the gussets in.  Stupid.  If you're really interested, I can draw you a picture, but only if someone asks :o)

All that said, my sample glove was done in less than an hour.  And to my utter astonishment, it fit Youngest Son perfectly.  It looks like a big ole bear paw.  I love it!  Needless to say, I hurry up sewed the companion, hemmed them both, and counted the experiment a success.  I look forward to trying these again.  I'm pretty sure I can do a better job next time.


Saturday, October 26, 2013

Progress on the Boys' Coat

The last week or so has been spent working on Youngest Son's new wool coat.  I'm using Burda 9533 again -- it's just such a nice pattern.  This will be the last time though, since it's the second largest size in the pattern.  I'm pretty sure by the time he needs another new coat, he'll be too big for the sizes in the envelope.

I'm working with a suit weight wool melton this time.  And since the insulation isn't in the shell fabric, I put it into the lining instead.  This jacket is lined with wool/nylon knit overall, with an extra layer of fleece in the fronts and backs.  Putting fleece in the sleeves made them too tight, so I just used the wool knit in those.  Who says you can't use a knit lining with a woven shell?  I've done it lots of times and never had any trouble.

It's mostly done, just buttons and buttonholes to go (I bet you know how I feel about those by now).  Pictures to come.

Aside from that, I got some pretty fabrics for Daughter for 3 more dresses, and I'd like to get a top or two done for myself, and a couple of shirts for the husband, and...oh, well, nevermind.  I'm really concentrating on knitting projects just now, so I'll have something to show you in that department soon, too.

I realize I also never showed you pictures of my own wool melton coat that I made this Spring with this Butterick pattern. I'll get right on that -- just as soon as I sew the buttons that just fell off back on. *sigh*

Thursday, September 5, 2013

Hello Vogue -- Thank you for the Men's Peacoat Pattern

My guys all like to wear Pea Coats in the wintertime.  And there is nothing so nice and warm in a New England winter as a wool melton Pea Coat.  I had to break down and buy one for each of my older sons last year, after a long and fruitless search for a pattern that would do the job.  Granted, I'd never sewn a men's coat before, but I was ready to take up the challenge.  I have made a wool melton coat for Youngest Son, and I rather figure the men's version is just larger.  And bulkier.  And harder to handle.  But I was ready.

But the pattern companies let me down.  *sigh*

Well, I was browsing patterns a couple of days ago, and look what I came across! Vogue 8940 Men's Jacket and Pants.  Designed for heavy wools.  Woo hoo!  Wee Hee!  Get outta my way, I'm goin' to the fabric store to pick that baby up!

Tuesday, March 12, 2013

Progress on the Melton Coat

I'm getting there!  I worked steadily on it all weekend, stealing little bits of time (and some two hour blocks, too!) here and there whenever I could.  I made fantastic progress, even though I decided to do lots of interfacing, a back stay, and shoulder reinforcement.   Just hems, shoulder pads,  and buttons left to go -- but those always seem to take the most time and are the least fun  :o(


Saturday, March 9, 2013

Progress on the Wool Melton Coat

Whew!  Took me two hours, but I finally got all the pieces for my new coat cut out and sorted.

The melton is smoke colored.  The lining is a black and gold metallic sari fabric from JoAnn's.  Heavy weight interfacing.  Haven't picked out the buttons yet.

I shortened the pattern by 5 inches since I wanted this coat to be not quite as long as the one I made before, but that's the only thing I did differently from last time.  So it should turn out to be about the same length as the orange one in the picture.

Maybe I'll get time to work on it some more this weekend.  After all, the sewing is up next and that's the fun part :o)

Friday, March 8, 2013

New Coat of Wool Melton

I got my fabric washed and hung to dry last night and so I'm ready to go with a new coat for myself.  I'm going to make another version of Butterick 5685.

The first version I made in the Fall of 2011 and I've been wearing it as my winter coat ever since.  I wear a wool sweater underneath it when it is particularly cold, but for the most part, it is a very cozy country winter coat.

What I'd like now is a city coat.

My plan is to make the Butterick coat in its shortest length, and give it at least two inside pockets so I have places to put my stuff.  When I go to the city, I hate carrying a purse -- not because I'm afraid of purse snatchers -- but because I hate having my hands perpetually tied up with holding something, so I've decided pockets are a must.

My fabric is a smoke colored dark charcoal wool melton that I got from Fabric.com a couple of years ago.  I really bought it as more of a jacket rather than a coat fabric so it's not that really thick coating melton, but the lighterweight jacket variety.  I think it'll be fine, though.

So why am I making a new coat this late in the season, with Spring just around the corner?  We're planning another trip into Boston, to see the Dropkick Murphys in concert, and I need a new coat :o)  With any luck, I'll get a new pair of shoes, too.  Specifically, these from http://www.onlineshoes.com.  Classy or what?


Sunday, December 16, 2012

Girls' Burda Coat -- Long Review and Lots of Pictures!

Whew!  So it's finally finished.  After two weeks of working very carefully on this thing, I think I can finally call it finished.  I have so many things to be pleased about.

First, I got it finished and it looks beautiful, inside and out.  Second, it fits.  A little too well perhaps, for there is very little room for Daughter to grow.  On the other hand, that means I get to make another one next year.  Third, I finished it in time to enter it into the Pattern Review Sewing for Children contest.  After missing the deadline for the LBD contest, this is a big deal to me.  And fourth and most important, Daughter loves it.  I say again.  I am pleased.

Let's start with the pattern.  This is a Burda magazine pattern, 12/2012 #156.  I downloaded it from the BurdaStyle site, taped all the pages together, and ended up with the awesomest little girl coat pattern ever.  Never mind that I had to add seam allowances.  It's a great pattern.


Burda suggests wool tweed with velvet collar and piping.  I did mine in a wool plain weave flannel that I bought from Miss Fairchild of Pattern Review either earlier this year or last year.  I used three different fabrics: a rose, a gray, and a plaid.  All pretty much the same weight, though the plaid is a touch lighter than the other two.  It's lined with a spruce green polyester silky fabric bought from JoAnn's as stash lining fabric God-only-knows when.


The instructions, like all Burda instructions, were vaguely incomprehensible.  After reading through them once, I decided logic would have to serve me well on this project.  Having never made a coat quite like this before, it's a good thing I learned logic while learning how to write in Java and C++.  Because I had to logic my way through the Whole. Darn. Thing.

The first thing I love about this pattern is the pockets, complete with pocket flaps.  No fake pockets for my Daughter, these are the real deal.  Set into the waist seam, the pockets should have been easy.  I had to make three tries, though, to get them in just right.  I'm glad I kept working at it because in the end they turned out beautifully.


Getting the piping (it's not actually real piping because it has no cord but I'm gong to call it piping anyway) to curve around the edges of the pocket flaps was a real challenge, but add some steam and heat to wool fabric and it's putty in your hands, so to speak.


And I think the idea of two-piece sleeves in a little girl's coat is just plain cool.  So grown up and everything.  I doubt Daughter cares that her coat has two-piece sleeves, but I positively adore it.  The sleeves gave me a bit of trouble, too, as I didn't realize until I had fought to line up the sleeve cap, decided it was a lost cause, and bound the whole thing  that the side seam was not supposed to match up with the sleeve seam.  Duh.


Did I mention that I bound all the seam allowances.  Every last one, excepting the pockets (which on second thought maybe I should have) and the seam joining the fabric to the lining.  I simply cut some pretty quilting cotton I had lying around, folded and pressed it into binding and sewed it on all the seam allowances.  It's not even bias cut, just straight grain.  Didn't matter, since I didn't need any stretch anyway.


Binding the waist seam did give me a bit of trouble with all that bulk when I tried to put the bottom buttonhole in.  I ended up having to scrunch it out of the way while still keeping the facing in place to sew the buttonhole.  That was tense, but I got it in the end.


I also bound the facing edges.  I always like to see bound facings whenever it's practical.


And the back has this nice pleat which increases the bottom width for active girls who like to run around on the playground.


I got these really cool buttons at JoAnn's last year. I love metal buttons, so I grab the classy ones whenever I see them.  Daughter picked these out of many to choose from.


And the hems got a semi-decorative stitch for the binding, but I hand sewed the hem in place.  I used Steam-a-Seam first to keep the darn thing in place before I stitched.  Marvelous stuff, that Steam-a-Seam.  I've got to remember to use it more often.


So I had this thing all finished a couple of days ago when Daughter mentioned she'd like to wear her purple leopard print jacket with the hood underneath it.  Um, leopard print and plaid?  I don't think so.  Turns out she just wanted to have the hood.  So I sorted through my trusty pattern collection until I found a hood that I thought would work.  New Look 6853 has long been out of print, I think, but I used this pattern for Youngest Son's pants for a long time.  There is a jacket pattern in there too, and whaddayaknow, it has a hood.
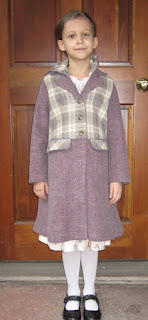


So I used this pattern to create a hood in the plaid fabric that sits under the collar.


The hood buttons on and off.  The only problem is the buttons catch on her braid.   I'm thinking I can make another hood in the gray fabric I used for the piping.   Maybe I could make a placket that covers the buttons.  And then Daughter could change her hood to suit her mood.  I wonder if she'd like that idea?


So there it is.    This is a great pattern.  Everything goes together beautifully and even the sleeve cap wasn't hard to ease into the armscye.  It was alot of work.  And worth every minute.  I look forward to doing it again next year.

Sunday, December 9, 2012

Girl's Burda Coat -- Nearly Finished Sneak Peek

This has been fun.  I've never made a jacket like this: so complicated and so cute!

And since Burda's instructions are so delightfully sparse, I've had to puzzle out alot of things in the assembly process.  Which has been challenging.  Which means I really enjoyed myself.

The first challenge: getting the not-quite-real piping to go smoothly around the curved pocket flaps.  It's not quite real because it doesn't have any cord inside.  Do you still call it piping if it doesn't have cord?  And if not, what do you call it?

Because I'm using wool, I could press it all I wanted.  I discovered that if I sewed it to the one pocket flap piece, I could press it to death to make it lie flat enough to attach the other pocket flap piece smoothly.  Nice.


The other tricky part was the pocket openings.  Since the pockets are in a seam, it should have been easy, but somehow I just could not wrap my brain around how to do it at first.  Took me several tries, but I finally got those babies in.  The waist seam piping is a little less than perfect because of the difficulty I had, but it still looks pretty good.

The other, other tricky part was those darn two-piece sleeves.  It wasn't until I sewed them in, accepted that I was never going to get the notches at the sleeve cap lined up just right, and bound the seams that I realized the underarm-ish seam of the sleeve was not supposed to match the side seam.  Duh!  My excuse there is that I have little experience with two-piece sleeves.  I know better now.  Took me two hours to rip off the binding of both sleeves and redo both seams.  Serves me right for being dumb.

The lining went together pretty easily.  Daughter picked this spruce color, which has absolutely nothing to do with the colors of the coat but seems to go with it well enough.


In any event, it's all assembled.  The neckline seam has not yet been trimmed and notched, the hems aren't in, I haven't done the buttonholes and buttons yet, and it hasn't been pressed.  But here's a sneak peek of what it looks like.  I don't have a good display dummy for Daughter's size, so you'll have to wait to see the whole thing in all it's glory until it's done and I can take Daughter out to get some fun pics around town.  Could be a few days, but you'll just have to wait :o)


Thursday, December 6, 2012

Progress on the Girls' Burda Coat

Every time I make another coat, I am reminded how much I enjoy working with them.  Especially ones made with wool.  I think I'm going to seriously work on my tailoring skills and make jackets for everyone in the family: a husband, three sons, and a daughter.  That should keep me busy for a while.

Daughter's coat is progressing nicely.  It took sometime to figure out what to cut out and then cut it all out.  Burda's instructions seem to be a bit...shall we say...sparse.  Which I don't mind.  I feel like they somehow give me credit for intelligence when they don't write out the no-brainer instructions.  Perhaps I would feel differently if the construction of the coat didn't seem so obvious to me.


Daughter chose a spruce green lining fabric.  It's just polyester, but I've used it for lining a number of wool garments, and it's really very nice.  I'm now down to my last couple of yards of it.

The fabrics are wool plain weave flannels.  I like the way the plaid and the rose go together.  The top bodice and the pocket flaps of the coat will be in the plaid.


The facings and collar will be in the rose.  I'm hoping this isn't too crazy a combination.  I like the plaid, but too much plaid is just too much plaid.  I wanted the whole coat to be in the rose, but I just didn't have quite enough.


Pockets made of the lining material, pocket flaps are plaid and the piping is gray.  It's not real piping -- it doesn't actually have any cord in it.  It's just a strip folded in half and sewn into the waist seam and around the edges of the pocket flaps.

So that's where we're at so far.

Tuesday, December 4, 2012

Next Project -- Girls' Burda Coat

Daughter has been growing and she needs a new coat.  I have plenty of wool fabric -- the only thing lacking was a pattern.  So I went on a pattern search.  It surprises me how few dress coat patterns there are for little girls.  But I eventually found the perfect pattern from the Burda 12/2012 magazine.     And it was available for download.  So I bought it. 

It's the Girl's Dress Coat #156.  And it's perfect.

Now, the only downloadable patterns I've ever used are the HotPatterns available from Fabric.com.  And those are pretty simple.  This one isn't simple.  As a matter of fact, Burda rates it with an Advanced difficulty.  And I've only ever sewn one Burda magazine pattern, even though I own 3 or 4 of the magazines.  So I figure this should be  interesting.

Getting the pattern to print out correctly only took a little fiddling with the settings on my printer panel and a couple of tries (always print the page with the scaling gauge on it first).  The pattern was 25 printed pages.  Whew! 

Crawling around on the living room floor taping them all together was pretty painless, too.  Burda at least numbers the rows and columns so it's rather difficult to get lost.

Traced pattern pieces
I'm used to tracing patterns, since I've been doing that for years.  But adding those seam allowances?  That took some doing.  I'm sure not used to that, but I think I've got it. 

And there's quite a few pieces.  The coat has a lining, and a collar, and piping, and facings, and a two-piece sleeve, and pockets with flaps.  Daughter was sure excited about the pockets with the pocket flaps.  Her brother has a coat with pocket flaps (another Burda, incidentally, though it's an envelope pattern) and she's been wanting the same ever since. 

It's also supposed to have shoulder pads, but I think I'm skipping those unless it looks like it really needs them in the end.  I'd have to make special mini shoulder pads.  Hmmm.  That might be fun just for the novelty value.

So, it's all traced out.  The wool I'm using is a flannel in a plain weave.  I have three pieces: a solid rose, a solid gray, and a mustard, red, gray plaid (ooh, it's prettier than it sounds).  I don't have enough of the rose for the whole coat, so I'm going to coordinate them and try to make something cute out all three.  I have an idea already...


Sunday, October 7, 2012

Knitted Fingerless Gloves


You know, it's really hard to take decent pictures of your own hands.  But here they are: my new fingerless gloves for this year.

Every year I usually make a new pair, simply because I either wear out the old pair or I get tired of them.  I wore my last pair for two years -- they were made of a multicolored yarn, primarily teal with some browns and yellows and white mixed in.  But teal doesn't go with virtually anything I own so I decided I needed a slightly more neutral-colored pair for this year.  Not that purple is exactly neutral, but it's better than teal.

There's no pattern, just an adaptation of instructions from Zimmerman's Knitting Without Tears, since it doesn't actually address fingerless gloves -- just mittens.  I learned to knit about 20 years ago from reading this book, so I have a nostalgic attachment to it.

The cuffs and the finger/thumb openings are simple 1 X 1 rib knit, the body is plain knit.  I made these using one circular needle instead of double pointed ones.  The yarn is a variegated superwash in merino wool.  It's pretty soft but still just the tiniest bit scratchier than my old teal ones.  I also think that I used a needle a little too small for the yarn.  It makes the gloves a little less stretchy than they could have been, but it also makes them denser and warmer, so it's probably okay.

I like the way these turned out -- they look a little like blueberry ice cream -- which I think is kinda neat.

Wednesday, February 15, 2012

Pictures of the Boy's Jacket

And some nice pictures of Youngest Son's Burda Wool Coat.  I love this coat.  I'm thinking about a version for me only more girl-looking.


He always wears it with the collar turned up to show the blue lining of the undercollar.


The back with its decorative leather loop.


The leather sleeve patches that are definitely not elbow patches.


Without a doubt, one very nice coat!

Sunday, February 5, 2012

PR Menswear Contest Day 5 and a New Project

Almost finished with my son's shirt.  All that's left is to sew the buttonholes and sew on the buttons.  Five days from beginning to end is not bad.  Not bad at all.

What I'd like to make next is this coat from Orvis.  I just bought some awesome 50%wool/50% acrylic olive green suiting from Fabric.com (sadly out of stock, but I got 10 yards, woo hoo!) that is perfect for this jacket.  I also have a stock of leather scraps in a couple different shades of brown, so I should have all the supplies on hand.  What I haven't been able to locate are those cool bone buttons -- I'm probably going to have to compromise on those.

I have two Burda patterns that I'm going to morph into this jacket.  Burda 7704 and Burda 8186. 

I'll use 7704 for the collar (which I'm going to have to widen and shorten) and the patch pocket placement (and therefore the seam which I think those front pockets are sewn into).

And I'll use 8186 for the breast pocket placement (and therefore the placement of the leather shoulder patches), the bottom front hem and the back vent. 

There's no back view of this jacket on the Orvis website, but it looks like there's a back yoke as well.  For that part, I'm going to have to wing it.

I'm not sewing this coat for the Men's Wear contest -- I really don't think that 10 days is nearly enough time to tweak the patterns, make the muslin, and sew the coat.  Well, not without completely ignoring the rest of my life, anyway.  But, of course if by some miracle it does get done before the deadline, well...

I washed the wool today, and it is now hanging to dry.  So it's on to finishing the shirt.  I've reviewed this shirt already, so then it's just a matter of taking a pic, editing my review, and submitting the entry to the contest.  Yay!  I actually did it!

Monday, January 9, 2012

Boys' Jacket--Burda 9533


It's been a busy week, so it took me this long to find the time to sit at my computer and do the write-up for this project.  Here goes:


The pattern is for a semi-fitted boys' jacket or vest.  I made the jacket in a US size 9, European size 134.  The idea was to make him a classy jacket that would keep him warm in New England winter.  I think I achieved that.


The pattern calls for cotton, sweatshirting, gabardine, or corduroy as fabric suggestions, but I got all creative and used a toasty warm wool melton that I got from Fabric.com a couple of years ago.  Youngest Son picked a teal-ish Catalina shirting for the lining.  Not my first choice, but actually an excellent one.  He might have better taste than I do.


There's a number of really neat things about this pattern.  There is not only a back yoke (that's used for shaping), there's also a front yoke (as a design detail.  Two extra seams, but it's very nice-looking.

The patch pockets and pocket flaps are lined with the lining fabric.  Very cool.  I imagine it wouldn't be that difficult to do self-lined pocket flaps if I were doing this in a lighter weight fabric, but for the melton, this idea is downright brilliant. 

My topstitching of the patch pockets could be better, but as they say, it passes the 20 mile an hour test.

The undercollar is also of the lining fabric.  Seriously, I love the idea of using a cool lining fabric and then also using it to accent the fashion fabric.  Especially with boys' clothes.  It's always so hard to make them stuff that isn't boring.

The knit cuffs are also an interesting design feature.  They are attached to the lining first and then attached to the sleeve.  Made with ribbing, they stretch to fit over gloves.  If I make this one again (a distinct possibility as either a light jacket in Spring or another winter coat next year or maybe even both) I will make the cuffs a little smaller so they're a bit more snug around the wrists.


The sleeve patches are a bit odd, though.  I originally thought they were elbow patches, but the placement diagram on the pattern pieces puts them on the outside of the arm.


I think they're just supposed to be decoration.  I used black sheepskin leather for the patches, just topstitched along the edge with a leather needle in my treadle machine.


I used another piece of leather for the loop at center back.


The pattern calls for only three buttons, as the jacket is supposed to have lapels and a roll line.


However, for warmth, it really needs a top button.  So I placed a top button and slightly adjusted the placement for the rest of the buttons.

Hmmm.  Doesn't look as good buttoned all the way up, but if it's that cold out, looks is a secondary consideration.


I left out the shoulder pads as they seemed unnecessary, but I would include them in a Spring version.  They would definitely lend a tailored look to a jacket that already looks pretty sharp.


This is a really nice pattern.  Technically, it is very well drafted.  All the notches fit, the sleeve cap has a perfect amount of ease, the proportions are just right, and it fits nicely.  Highly recommended.