Showing posts with label princess line. Show all posts

Saturday, September 28, 2013

Mini Wardrobe Contest -- Third Piece Finished!

I had some sewing time open up yesterday, so I spent those precious few hours working on the next piece of my mini wardrobe: the safari style vest.

I really like the way this turned out, even though I'm not terribly excited about the collar.  It also doesn't look a whole lot like what I had drawn in my storyboard, except in a general sort of way.  I was planning to use just a plain vest pattern and adding some pockets, but when I looked through my stash of patterns, I found that I didn't actually have a plain women's vest pattern.  Amazing.  I tend to collect plain patterns, so I can use them for a base and then apply my own creativity to them (which I haven't done lately, but the intention is there).


Instead, I found this Butterick pattern, B5616,  which I decided was close enough to what I wanted.  The pockets are just plain patch pockets, rather than expanding cargo pockets, but since I used a stretch sateen they kind of expand anyway.  It's unlined, which is okay -- I just serged the seams and some of them are topstitched down as well.  And it has a higher neckline than I was quite envisioning, along with the collar, which I wasn't intending at all.    But I decided to go ahead anyway.

I traced a straight size 6 in the View B with length of View A and pretty much followed the instructions.  I had to take in the sides about two inches and gave it some waistline shaping, of which it has practically none. The envelope says that it's loose-fitting, but even though I've used lots of Big4 patterns, I wasn't expecting quite so much ease.  I left off the back ties, though on reflection, maybe I should have put them on -- the vest still fits a bit more loosely than I'd like.  I'll probably sew this again, in a non-stretch fabric, with the other collar option.  I have a really cute brown and pink paisley Kaufman corduroy that I think would work great with this pattern.  Oh, wait.  It's a stretch corduroy.  Oh, well. Whatever.

All in all, I like it.  And it goes well with the linen shirt and with the tank top.  I still have a few days before the contest ends.  If I get a move on, I can get those pants finished.

Tuesday, March 12, 2013

Progress on the Melton Coat

I'm getting there!  I worked steadily on it all weekend, stealing little bits of time (and some two hour blocks, too!) here and there whenever I could.  I made fantastic progress, even though I decided to do lots of interfacing, a back stay, and shoulder reinforcement.   Just hems, shoulder pads,  and buttons left to go -- but those always seem to take the most time and are the least fun  :o(


Saturday, March 9, 2013

Progress on the Wool Melton Coat

Whew!  Took me two hours, but I finally got all the pieces for my new coat cut out and sorted.

The melton is smoke colored.  The lining is a black and gold metallic sari fabric from JoAnn's.  Heavy weight interfacing.  Haven't picked out the buttons yet.

I shortened the pattern by 5 inches since I wanted this coat to be not quite as long as the one I made before, but that's the only thing I did differently from last time.  So it should turn out to be about the same length as the orange one in the picture.

Maybe I'll get time to work on it some more this weekend.  After all, the sewing is up next and that's the fun part :o)

Friday, March 8, 2013

New Coat of Wool Melton

I got my fabric washed and hung to dry last night and so I'm ready to go with a new coat for myself.  I'm going to make another version of Butterick 5685.

The first version I made in the Fall of 2011 and I've been wearing it as my winter coat ever since.  I wear a wool sweater underneath it when it is particularly cold, but for the most part, it is a very cozy country winter coat.

What I'd like now is a city coat.

My plan is to make the Butterick coat in its shortest length, and give it at least two inside pockets so I have places to put my stuff.  When I go to the city, I hate carrying a purse -- not because I'm afraid of purse snatchers -- but because I hate having my hands perpetually tied up with holding something, so I've decided pockets are a must.

My fabric is a smoke colored dark charcoal wool melton that I got from Fabric.com a couple of years ago.  I really bought it as more of a jacket rather than a coat fabric so it's not that really thick coating melton, but the lighterweight jacket variety.  I think it'll be fine, though.

So why am I making a new coat this late in the season, with Spring just around the corner?  We're planning another trip into Boston, to see the Dropkick Murphys in concert, and I need a new coat :o)  With any luck, I'll get a new pair of shoes, too.  Specifically, these from http://www.onlineshoes.com.  Classy or what?


Friday, February 1, 2013

OPML -- Last Dress in Green Wool Jersey

And here is the final dress for the One Pattern Many Looks PatternReview.com contest.  Taking one pattern and using it with different fabrics to create different looks was quite an interesting challenge.  I still have one more color blocked dress that I'd like to make, but time ran out for me and the contest ended before I had a chance to get to it.  I'll probably still make the dress, because I still think it's a good idea and it'll make a fantastic dress, but I might not get to it for a little while.

This one is made in green wool jersey.  I bought this jersey last year (I think) from Fabric.com in four different colors: hot pink, cognac, green, and granite gray.  It's a very comfortable 100% merino wool.  I used the pattern just as it is.  Paired up with a medallion belt, black tights and kitten heels, I think this is a very nice outfit.  I'm wearing it today with my brown Merrel wedge boots, and it looks great with those, too.


Here's the collage of all the dresses.  I had to take the picture off the green one at night, since I just finished it last night at 11.30 -- just thirty minutes before the end of the contest.  I've never sewn so fast in my life.

I'm pleased with these and I've added some nice pieces to my wardrobe.  And they'll be great to wear right up until the weather gets too hot come summertime.

Tuesday, January 29, 2013

OPML Contest -- Fourth Dress is Spanish Holiday


This dress is made with the pure, unadorned pattern.  I'm counting on the print fabric itself to make this particular incarnation unique.  It's another polyester onion skin, also bought from Fabric.com.


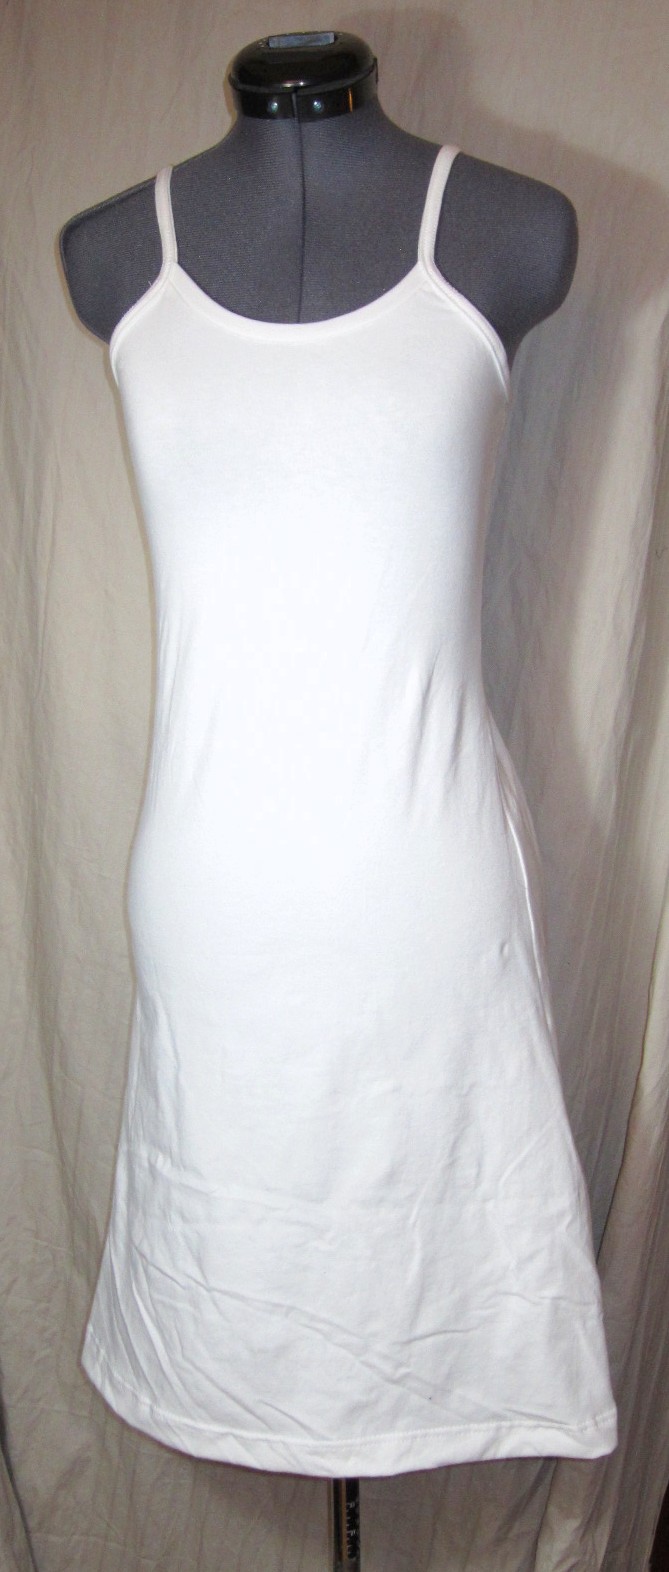
I made a cotton knit underdress to wear with this dress and the Victorian Rose one.  I've already made a pattern for it, though the original was intended to have crossed straps to go under a racerback tank top dress.  I can't cross the straps on this underdress because the neckline of these onionskin dresses is too wide and they would show.  I wish I would have made the straps just a tiny bit longer, as the neckline at the center front sits just behind the neckline of the top dresses.  It doesn't show, so I guess it really doesn't matter.

Now I have just to sew together the wool jersey dress, and I will have finished my entry for the contest:  the black LBD, the Victorian Rose, the Spanish Holiday, the black and red print, and the wool jersey.   If I have time, I want to make yet another color-blocked dress in a black and white print.  But the end of the contest is in two days and I don't think I'm going to make it.

Sunday, January 27, 2013

OPML Contest -- Third Dress is Victorian Rose

Here's dress number three.  The fabric is a polyester onion skin from Fabric.com.  I've never sewn (or worn, for that matter) onion skin before -- one of the reasons I bought it was that I wanted to try sewing a fabric that I've heard so many people  talking about. 

I don't like polyester in general.  I don't really like the way it feels against my skin, and it usually makes me feel pretty hot.  But I thought I'd give it a try anyway.  I can definitely understand why people like it, and if I traveled more, I would be more fond of it.  You can fold it up tiny, it doesn't wrinkle very much, and I bet it would dry lightning fast after washing it in the hotel bathroom.

The fabric is a dream to sew, no doubt about it.  It wasn't that fun to cut out, though.  My rotary cutter went through cotton jersey like a hot knife through butter, but when it came to this stuff, there were always threads that somehow didn't get cut.  Trying. Very trying.  I almost lost my temper a few times.

When all's said and done, I got the dress cut and assembled and it only took around a hour.  Truth is, though,  I'm not sure about it.  I like the color--though pink is really not a color that I like very much on myself.  I really like the print, but I think it would suit me more if it was a darker or duskier pink.  And I like the concept of lace sleeves, but I'm not sure that the ivory lace is quite appropriate, even though it goes beautifully with the print.  What I'm really not sure about is that the look isn't just a little too "young" for me.

Let me say here that I've never liked the concept of "dress your age."  What is that supposed to mean?  What does "dressing like 40" look like?  And who gets to decide?  And why?

On the other hand, I don't want to dress like I've just raided my 20 year old daughter's closet.  Because I am old enough to have one (my oldest is a son and he's 22).  And let's face it.  There are some clothes that look fabulous on a twenty something that look downright ridiculous on a forty something.

So this dress is by no means a failure -- I like it too much for that.  I'm just not sure it's for me.  I'll ask you all what you think once I've had a chance to try it on.  I need to make a white slip before I can do that, since the fabric is pretty sheer.  It's not obvious in this picture, but you can pretty much see clear through this baby.

Friday, January 25, 2013

OPML -- Another Dress

I actually made this one first -- because I have many, many yards of black jersey and I wanted to make sure that I was going to like this pattern made up in the shorter length.  And I didn't post it first because it's black and there's not much to see.  When I get all the dresses done, I'm hoping to get one of my photography-savvy sons to take some nice outside pictures.  Which we'll do if the temperature gets above 10F degrees.  Which it hasn't for days.

I didn't really need another Little Black Dress, but I actually really like this one.  It's more comfortable than the other one, though not nearly as elegant.  If I get nothing else out of this contest, I'll still be pleased as punch to have made both this dress and the red-and-black one.  So as far as I'm concerned, it's a win-win no matter what happens between now and the end of the contest.


As for my progress, I've cut two new dresses, though I haven't done any sewing.  The first is in a solid green wool jersey.  Not quite the emerald green that is the color of the year, as they say (and who is they, anyway?) but in a color that is close but a bit duller and yellower.  Hmmm.  Hard to describe.  I'm going to wear it with the gold medallion belt that I wore with the brown maxi-length version of this same pattern.  I had sewing time over the weekend, but no matching thread.  And my car was in the garage, so I couldn't make it to the fabric store until Tuesday.  *sigh*

The second is an onion skin jersey knit.  Rose pink with a Victorian-esque swirling pattern.  I have a piece of ivory knit lace whose color and pattern goes strikingly well with the pink, so I decided to give this version of the dress lace long sleeves.  I'm probably going to have to sew a white slip to go underneath it as well, since I think it's a bit too sheer to wear alone. In theory, it sounds pretty, and it looks nice lying on the table, too.  We'll see if it works when it's all sewn together. 

Saturday, January 19, 2013

OPML Contest -- First Dress

So I've entered the One Pattern Many Looks contest on Patternreview.com.   For those of you who don't know, the OPML contest involves taking a single view of a pattern and making it up in with different fabrics, trims, color blocking, hem and sleeve lengths, etc to make many different looks without changing the actual structure of the pattern.

I've decided to use my princess seamed knit dress pattern that I've made several times before, albeit as a maxi dress.  This is a pattern that I've been refining for the past couple of years, and I won't say it's perfect, but I do like it alot.

For this contest, I changed the neckline to a more of a scoop neck than a crew neck.  And I cut many inches of the hem so that it falls just above the knee instead of at the ankle.  The sleeves remain long sleeves, since even Spring in New England is pretty chilly, so that, if nothing else, I'll have a few three season dresses out of my efforts.

This is the first one that I'm sharing.  The picture could be a little clearer -- I'll have to take a few more. I used a deep red cotton jersey with a black floral print for the main body and solid black cotton/lycra for the trim.  The cotton/lycra didn't really want to play very nicely with the plain cotton jersey, but I gave it a bit of a lecture and it agreed to behave.  You have to talk to fabric, you know.  It is often very open to reason.


I decided to use color blocking to make a contrasting waist band type thing in the black, and then bound the neckline and sleeve hems with it as well.  Is it terribly creative?  Not really.  But I do like the effect.  I was wondering what to do with this red floral fabric, and I think this really fits.  And since it's broken up by the black, I don't look quite so much like I'm being eaten up by a bunch of black flowers.  I like it, and I am very pleased with this first attempt.


I can pair it up with black boots, but it also looks good with my high heeled shoes, low heeled shoes, and ballet flats.  A fairly versatile dress.


Wednesday, January 16, 2013

PR One Pattern, Many Looks Contest


One Pattern, Many Looks

This is one of the (to me, anyway) more interesting of Pattern Review's contests:  Take a pattern and make multiple garments without altering the actual structure of the pattern.  This involves things like color blocking, piping, ruffles, decorative buttons, and other purely ornamental stuff.

Self drafted patterns are allowed, so I intend to use the pattern I drafted to make  this dress.  I am going to change the round neckline to a scoopneck and shorten the hemline to above the knee, but other than that, I will use this pattern just as it is.  Well, okay, I'm also going to color block it in some places to get one of the "many looks," but that is allowed within the rules.

As for the different versions, I'm thinking I'll make the first one in black.  Just a plain LBD with no frills.  It'll be the one that you can compare all the others to. 

One I'm going to color block in a waistband, another I will color block in some  contrast pieces for illusional (is that a word? delusional is and it's kinda the same thing, right?) shaping.  That means I'm going to make a dress that encourages anyone who sees me to believe that I actually have a waist, when I don't really.  My waist is actually just a suggestion.

If I have time, I will probably make another in one of the pretty onion skin prints I ordered last week.  If I like them.  They haven't arrived yet, so there's still time for me to hate them with a passion.

And possibly another with lace sleeves.  Because I just love lace.  Doesn't everybody?

Three to five dresses in just the two weeks left in the contest sounds pretty ambitious, but the beauty of this pattern is that it really doesn't take that long, from cutting to hem.  The longest part is going to be adjusting the pattern for the color blocking, but I have confidence that I can do that pretty quickly.

Thursday, November 1, 2012

Rayon Maxi Dress-- Gotta Love it!

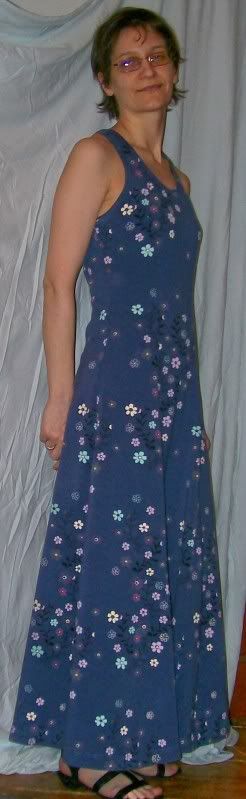
I thought I'd post this since I'm wearing it today and I really love the way it looks and feels.  Sadly, since it's in dark brown you really can't see too many details.

It's a simple pattern for knits that I drafted myself.  Princess seams for shaping the bodice and adding fullness to the hem, and a plain neckline.  It's a couple of inches shorter than ankle length and it looks good with boots or nice heeled shoes.  It ought to be a very boring dress, but I think the fabric is what makes it happen.

The fabric is a medium weight rayon/cotton jersey, and it's another piece I bought for my men that turned out to be too feminine for them.  This time it's heavy enough, but it is so drapey, the guys really didn't like it.  That's okay.  I score alot of fabric that I buy for them that they end up not liking.  It also pills, so I have to wash this inside out on the handwash setting.

The belt is gold colored medallions and I have no idea where I got it.  I like chain belts since they're one of the few types of belts that I can get that will actually fit.  Most are too big and I've seen some real beauties that I'd love to have if I could just make them a couple of inches smaller.  I'll probably end up making my own anyway. *sigh*

With any luck, I'll get my hour in today.  I can sew Daughter's nightgown in an hour or cut out her dress pieces or make some serious progress on Jordan's shirt.

I just realized I've got three projects actively going at once.  Do you guys do that too, or do you just work on one until it's finished and then move on to the next one?

Saturday, November 5, 2011

The Fall Jacket -- Finished At Last!


Yay! It's Done!

I'm so happy with this finished jacket and so pleased that it turned out so well.

I've only ever used a couple of Butterick patterns and I've been pretty happy with them --  it could be that the other Buttericks I've sewn have been loose-fitting and the normal issues I have with patterns just haven't come up.   Or it could be that for whatever reason their draft fits me right out of the envelope.  I ordinarily have to spend quite some time narrowing the shoulders and doing small bust adjustments.  Not so with the Fall Jacket.


Butterick 5685 and wool blend fabric

The pattern is Butterick 5685 and is designed for lightweight woolens, tweeds, or poplins.  I used a very nice 30% wool woven that I picked up at JoAnn's (an amazing find since my JoAnn's almost never has wool or silk) with leaves embroidered in rayon.  It sewed up beautifully -- a real joy to work with.  My only regret is that I have just a yard or so left.  On the other hand, the fabric is so distinctive it may not be a good idea to have too many articles of clothing made from it.  Hmmm. I think there's enough left for a vest, though...

First muslin -- this project
only needed one


The muslin, sewed right from the tracing, fit beautifully right from the get-go.  The only thing I tweaked was I trimmed 1/2 inch from each front to narrow it up a bit.  It pulled in the princess seams just enough so that their placement was more to my liking without really disrupting anything else in the jacket.  The sleeves are very nice with an excellent amount of sleeve cap ease -- enough for good fit but not too much to make assembly a nightmare. 
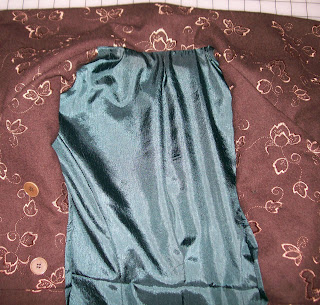


poly spruce -- I like the green and brown combo


The lining is a sort of spruce-colored polyester.  I bought half a dozen yards or so of this last year for making linings and I really wish I'd bought more.  Actually, I think I bought what was left on the bolt, so maybe I mean I wish there had be more for me to buy  :-)

Anyway, it makes a fabulous lining, with just the right amount of slipperiness for sliding over sweaters.  In fact, I was a little concerned that I made the jacket too small at first -- trying on just the shell dragged so much against the t-shirt I was wearing that it made the jacket feel very snug.  Horror!  Doom! Despair!

Then I slipped on the lining, and then the shell (the two hadn't been joined yet) and I couldn't believe how much roomier the jacket felt.  Behold the Power of a Polyester Lining!


I used woven fusible interfacing for the fronts and plain muslin as interfacing for the collar.  I trimmed the seam allowances of the interfacing before fusing to reduce bulk.  This really helped to make the corners nice and sharp when turned.


The shoulder pads are 1/4 inch instead of 1/2 inch like the pattern calls for and I certainly did NOT extend the outer edge 5/8 inch past the shoulder seam.  That's the aforementioned dreaded linebacker shoulders and I am so not going there. I bought these at JoAnn's yesterday since I decided I was too lazy to dig out the appropriate supplies to make my own.

So, I have mostly good things to say about this pattern's draft.  I should mention, however, that it is important to sew all the seams from the top down, as l discovered that the pieces did not all quite properly match at the hem.  The fronts in particular were shorter than the sides and back, so I ended up trimming a bit to even everything up.  I'd suspect sewing error except that the same difference occurred when sewing both the lining and the shell.

As for the instructions.  They're terrible.  At least in my opinion.  I read through them several times, at first to get a feel for the construction, and then to try and figure out why the heck they would put this jacket together the way they did.  I got the first, but I'm still baffled by the second.

The instructions have you sew the upper half shell and lining together, then sew the lower half shell and lining together, and then join the two at the waist seam (sewing the shell seam and slip stitching by hand the lining seam...ummm...sewing by hand, Butterick?  I think not).  After that, you get to fumble around a bit trying to put the sleeves and shoulder pads in while trying to keep the lining out of the way because hey! the lining sleeves are SLIP STITCHED IN BY HAND!!!  Need I say more?

What I did was first assemble the shell (all of it, including the sleeves), then assemble the lining (also including the sleeves), and then join the two along the front and neckline seam.  So simple.  So easy.  I can't for the life of me figure out why Butterick made it so damn complicated.

I stitched the cuffs differently as well, and I sure do wish I had done the buttonholes differently, because I really don't like them as they are.  It might not be too late to fix it, but I'm not going to do it right now.


The cuffs call for turning up the shell fabric over the lining and stitching the hem.  I pulled both the shell and the lining fabrics inside out between the shell and lining layers, placed them right sides together and sewed them together at 3/4 inch seam allowance.


Trimming the lining would have kept it
more firmly inside the sleeve
I should have trimmed the lining about 1/2 inch as this would have guaranteed that the lining would stay inside the sleeve when the jacket was slipped on, but this is a minor issue and one I'm not going to worry about.


The buttonholes are placed on the edges of the jacket both on the inside front layer and the outside front layer.  This means that the inside layer gets buttoned awkwardly and I don't like it.  It also means there's buttons on top of each other on that side -- the inside functional ones and the outside decorative ones (I couldn't figure out at first why the pattern called for 6 buttons...).  I will likely sew shut the buttonholes on that inside layer and put buttons there while putting two button holes near the princess seam on the outside layer so it's not so clumsy to button the jacket closed.

Now for the oddities.  I call them oddities because  I refuse to call them mistakes :o)

Not sure how this happened
but I intend to find out
The collar.  Note that mine doesn't extend all the way to the edges of the fronts like in the drawing on the pattern envelope.  There is exactly a 1 5/8 inch extension beyond the collar.  On both sides.  Except that when I walk the seam lines on the pattern paper, the seam lines match edge to edge.  And I staystitched the neckline of both the shell and the lining.  I'm going to sew this baby again just to see if I can duplicate the phenomenon.  I really want to know what happened there.

In any event, I actually like it better this way.  Somehow, I think it suits me more.  What I don't like is the button placement.  Because I used the pattern guide for buttonhole placement which plans on that corner being turned down a bit, the buttonholes are too far away from the edge and the top.  I sewed a small snap to the corner there to keep it from flopping around -- not the ideal solution but one that is good enough.


A good way NOT to do a hem
The other "oddity" is the hem.  You can't see this oddity, but I know it's there.  It will bother me for a while, but I am determined to ignore it :o)  I wanted a nicely finished hem, so I folded polyester organza ribbon over the edge and stitched it down like seam binding.  Bad idea.  Bad, bad, bad idea.  It would have worked if the hem had been straight.  But it wasn't.  When I folded up the hem along it's slight curve, the ribbon bunched up and rippled and generally made a nuisance of itself.  And it's too stiff.  I highly recommend against using poly organza ribbon as a seam binding.  I know I won't do that again.

Even with it's quirks, I absolutely love this jacket.  I tested it out last night for 15 minutes at 30F degrees -- it's a little too light for that temperature but should be perfect for 40F - 50F.  New England daytime Fall temperatures.  Exactly what I had in mind. 

I think this jacket is a great draft.  It fit beautifully all over and the sleeves didn't not have enormous amounts of sleeve cap ease.  While I don't need more than one jacket with a collar like this, I think I will use this pattern again after I find another collar for it -- it makes a really nice double breasted jacket.

Friday, October 28, 2011

Fall Jacket Muslin -- and It Fits!

Muslin for B5685 Size 8
Not a bad fit.  Not a bad fit at all.  Especially considering that the muslin is made of, well, muslin, and the actual jacket is going to be made from a light to medium-weight wool.  With a lining.  And lots of interfacing.  And a collar.  And... well, you get the idea.

After this, I may become a Butterick believer.  I've never had a pattern fit this well practically right out of the envelope.  All I did is shave about 1/2 inch off the front edges (cheating, I know, but it brought in the princess seams just where they needed to be without messing up anything else).

The sleeve cap, for once, doesn't have a ton of ease.  In fact, it has just enough to make room for the very modest shoulder pads.  I never did get that linebacker look -- I remember the '80s all too well.

Please, do try to ignore my hasty and sloppy seaming of the aforementioned sleeve seam -- this is just a muslin after all.

And look at how nicely that sleeve hangs.  No weird wrinkles, no need to rotate the sleeve, no nothing.  I think I'm in love.

I say that now, of course.  Before I've cut into the good stuff.  We'll see whether or not I have a change of heart after that.

Sunday, September 11, 2011

Progress on the Peasant Top and Shining Star Vest

Well, I've definitely decided on the Shining Star Vest, though mine will definitely be sans ruffles.  I looked at the actual pattern for the first time and it was pretty cool to note that it's got a couple more pattern pieces than I expected--there are separate pattern pieces for the lining because the pattern includes a fashion fabric facing--something that's been missing with the other vest patterns I've sewn.


Suede cloths on the left, linings on the right
I'm going to make it in this tan colored embroidered suede cloth--very rustic and classy at the same time.  Do those two adjectives go together? Not sure. :-) I'm also not sure there's enough of the tan to make the whole vest--I may have to make the back out of the green suede cloth.  That's not my first design choice, but I'm willing to go with it.


I haven't picked a lining yet, but it's going to be one of those in the pic--they're all crinkly, shimmery polyester stuff that will make the perfect lining.  I'm leaning heavily on the spruce, but I haven't made a commitment yet.  The red or the brown actually matches better, but  I used the green to line a pair of wool pants last winter and it handled beautifully and is surprisingly comfortable to wear.

I've got the pattern scotch taped together and cut out in the size 6--I've only got to finish its companion peasant top before I'm ready to begin.  I fully intend to make a muslin of this one first, though.  I usually have to do a bit a fitting adjustments to anything with a princess seam.  I haven't saved this fabric all this time just to mess it up.  :-o

Speaking of the peasant top, I've decided to use the hazelnut cotton/silk voile.  This stuff feels like heaven against your skin, it's so airy and smooth.  It was a little tricky cutting the pattern pieces out--the fabric wanted to really slide around and go off-grain on the table.  I considered starching it to make it a little more easy to handle, but since there's only 3 pattern pieces and they're pretty basic, I just decided to use a bright light (sunlight, actually, yesterday morning) and keep a close eye on the grainline.  It all went swimmingly until the sun went behind a cloud--my artificial lighting wasn't nearly as good--but I got the job done and the pieces are laid out, all ready to sew.

Friday, September 9, 2011

Progress on the Peasant Top

Well, I've got the pattern traced and cut out, but when I went to pull out the fabric, I discovered that my two voiles were not really as opaque as I remembered them.  And the hazelnut had not yet been prewashed. I've gotten a bit lazy lately and I haven't been prewashing my fabrics as soon as I bring them home like I usually do.  So while the pattern is all ready, the fabric is currently swishing away in the washing machine, along with a really pretty piece of rayon challis that is perfect for a fall wardrobe addition--not sure what that will be yet. Once the fabric is washed, dried, and ironed (all 6 yards of it) I'll be ready to go.

But since the fabric is more transparent than I thought, I really need to pick a vest to go with it.  My current runners up are:

The Shining Star Vest from HotPatterns

or
McCalls 5186 View C or D

They're all somewhat similar (of course there's only so many ways to design a vest) --they all have princess seams for shaping but the HotPatterns vest has an edge-to-edge closure instead of the standard button and buttonhole deal.  View D has a more open neckline, which I really like, but I'm wondering if it might gape open funny as open necklines have a tendency to do on my rather slight frame.

I'm leaning towards the HotPattern--mostly because I have these really neat closures from Home Sew that I've been saving for years just waiting for the perfect project. It's also another free Download from Fabric.com and I've already got it printed out.  It's not assembled yet since I've haven't been inspired to crawl around on the living room floor armed with my imagination and a roll of scotch tape lately, but it shouldn't take long to get the job done.

Saturday, May 14, 2011

Serging Long Seams in Knits

I don't often pin baste any kind of seam before stitching except the loooooong ones.  Like in this knit maxi dress.  This has armhole princess seams in both front and back--making six long seams that have to be sewn just right.

The first thing I do is lay the first two pieces, right sides together along the seam line on my cutting table.  I like to start with sewing center front to one of the side fronts.  If I cut my pattern pieces correctly, they should match up between the lowest notch at the bust and the hemline. 

If they don't, I have to pull out the paper pattern and find out what went wrong.  Sometimes the paper pattern shifted during cutting and I didn't notice, sometimes there are errors in the pattern draft itself, and sometimes I have no idea what happened.
 
In a dress like this, it's usually possible to trim away the excess from the hem, as long as the bust notch, the waist curve and the hip curve match up properly.  If they don't, you'll have to recut the pattern piece. That's why it's such a good idea to check the pattern pieces before you start.

You should not  stretch your dress pieces on a long seam like this to get them to match.  Ever. Stretching either one will make your long seams ripply and, to be honest, look pretty ugly.

Once you have the pattern pieces lined up at the seams, place one pin at the under bust notch and one pin at the hemline.  Find an approximate halfway point--move up from the skirt hem, keeping the two pattern piece seam lines lined up and lying smoothly--and place one pin there.  This is the minimum number of pins for a long seam.  I like to use two more--one at each halfway point between the middle and end pins.

Next, I line up the notches above the bust and pin.  Since these two curves go in different directions for bust shaping, your seam line won't match up here and you may have to do a bit of stretching in this area--that's okay since the fabric is going to stretch over your bust there anyway.

It seems like it might save time to pin all the pieces together and then sit at the machine and sew.  You can try this if you like, but I've always found that I get stabbed by the pins in the seams I'm not working on and everything kind of gets all tangled up.  I prefer to pin one seam and then sew it.

Starting from the armhole, slowly sew to before the first notch.  DO NOT STITCH OVER THE PIN!!!  You can do some major damage to the knives of your serger, not to mention knocking out the timing or breaking a looper if you run pins through your machine.  Remove the pin and continue stitching.  You may have to stretch to get the fabric to lie smooth at these opposing curves.  Make sure the edges of the fabric line up with one another--sew slowly and take your time.  Once you've trimmed the seam allowance, you can't put it back, so make sure you only trim off what's allowed.  Remove the pin at the lower bust notch.

Hold the fabric at the next pin in your left hand.  Pull it toward you so that it is smooth but not taut.  Use your right hand to line up the fabric edges and to guide the fabric through the machine.  Do this in stages--at each pin, reposition your hands and use both of them to guide the fabric through the machine.  DON'T STRETCH!

Repeat this with the remaining seams and start all the seams from the top of the garment.  Directional sewing (sewing all seams going in the same direction) really does matter.

And after the seams are all sewn, don't forget to press.