Showing posts with label boys. Show all posts

Friday, May 23, 2014

Everything's Going Swimmingly

Hmmm.  I can't really make a joke to save my life, can I?

Here's the newest project: A pair of board shorts for Youngest Son.  Because we really want to be ready for summer swimming as soon as the water warms up.

The pattern is Kwik Sew 3430...one of the older ones that were still printed on heavy paper. I'm hoping I can use the pattern this year and next year yet, because after that I'll have to find a men's pattern for him.  Boy's patterns are so much easier to find than men's that I'm not looking forward to the treasure hunt.

Anyway, these are made from microfiber purchased from fabricfairy.com.  I only ordered 1/2 yard each of the print and the navy, not realizing how loooooong board shorts are.  So those navy design details at the hems of each leg?  Yeah, that's the extra length I needed for the pattern pieces.  If I'd checked the pattern envelope for yardage needed, I would've known.  I'm going to try not to make that mistake again. 

In any event, these went together pretty nicely with no problems.  Though I used 1 inch elastic for the waist instead of 2 pieces of 3/8 inch like the instructions call for.  You can't really see the front tabs where the lacing goes through because of the crazy print fabric, but they're there.

I think when I make these again, I'll sew 1 inch hems.  I think it would look better with deeper hems, but that's really the only thing I'd do differently.  We'll have to see how they work in the water before I can make a final judgement, though.

Monday, January 6, 2014

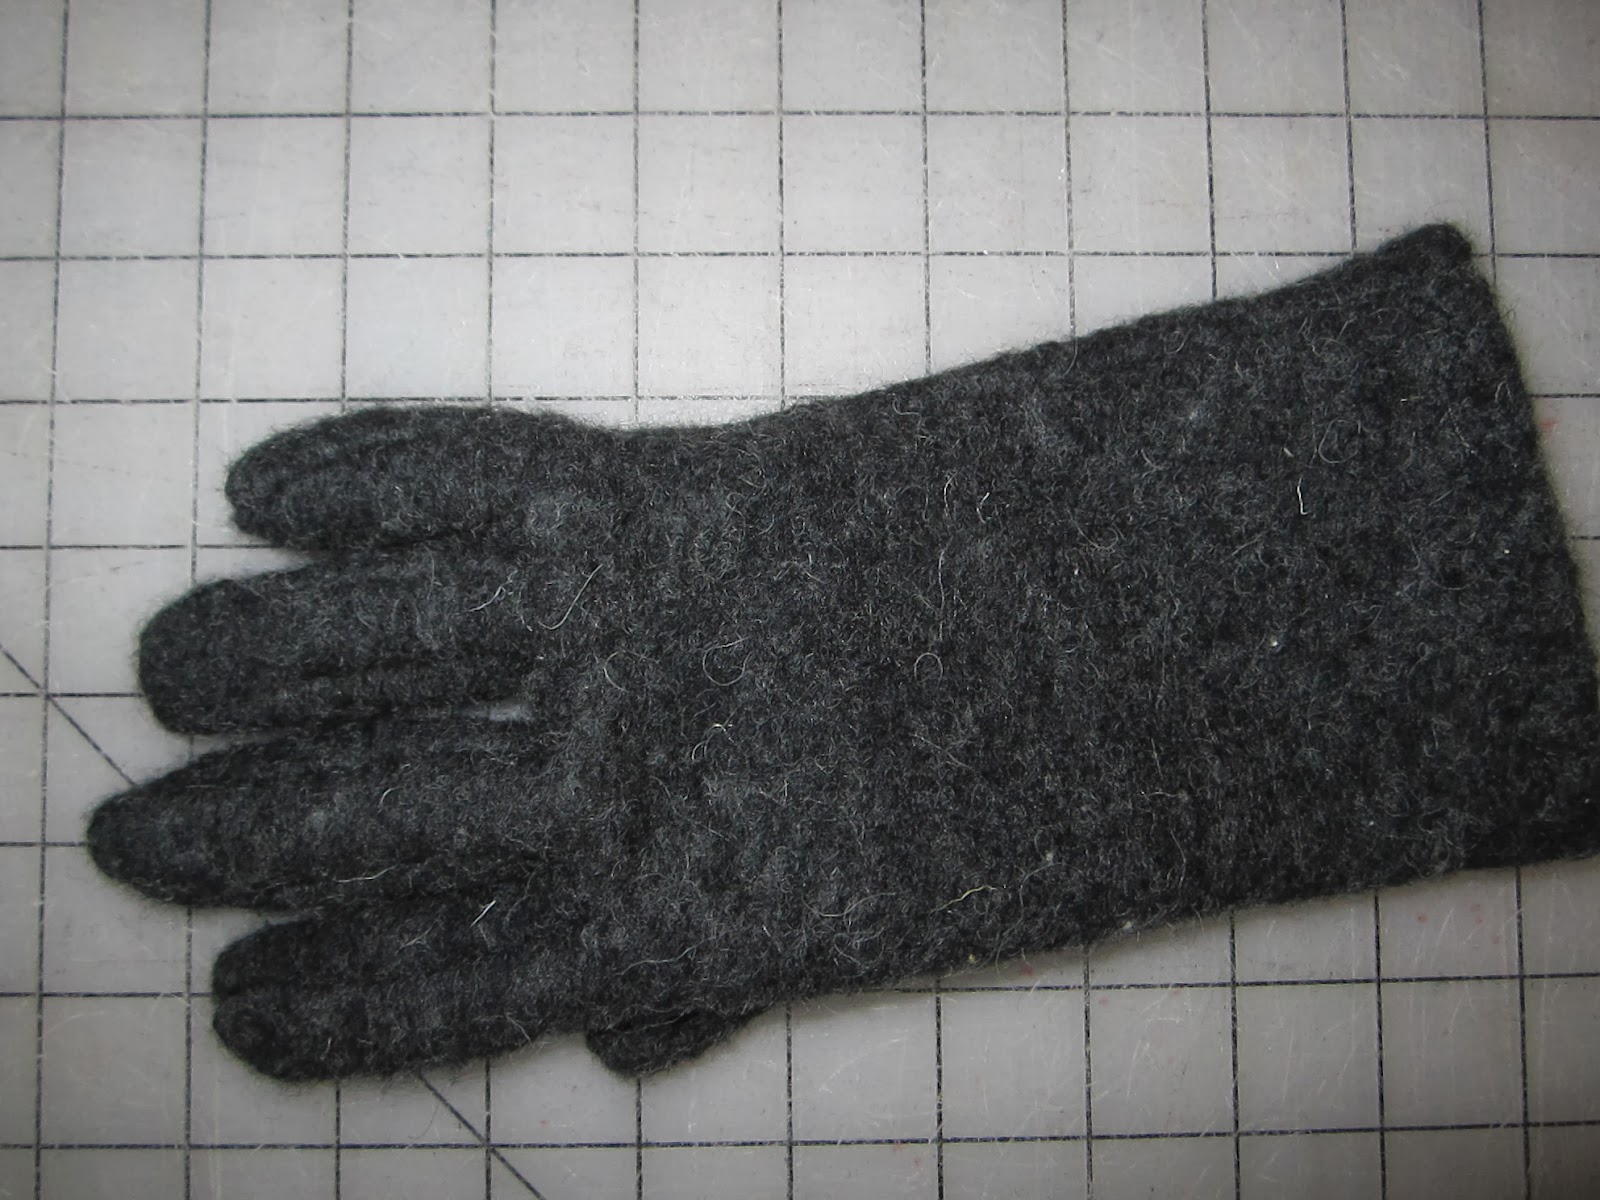
Last Year's Project -- Wool Knit Gloves

I have a number of projects that I finished at the end of 2013 --  and never got around to blogging about.  I'm going to try and catch up one project at a time, especially since my current projects are quilts.  And of course, those can take a really long time from start to finish.  At least they do for me.

First up: these wool knit gloves.  Youngest Son has big hands, but short fingers.  Which means that he can't even slip his hand into a boys' size glove, and the fingers of men's gloves are just too long.

So I figured it was about time a took a serious look at Butterick 5370.  These are from their Making History, um, historical collection.  I made Green Pepper's fingerless glove pattern a few years ago and found glove making an interesting challenge, but this Butterick pattern was the first one I came across for gloves with the actual entire fingers.  I had to have it, if only to adapt the Green Pepper fingerless pattern to a full finger pattern.  I noticed from their website (just now, as a matter of fact) that they, too, have a  full-finger glove pattern -- Note to self: get that one ASAP.

Turns out that such radical alterations weren't needed.  The Butterick glove pattern runs from a 7" hand to 9" hand, 1/2" inch larger than the Green Pepper.


I started out with the smallest size, thinking to just test the pattern and the construction challenges.  And when I say challenges, I mean challenges.  The most significant being 1/8 inch seam allowances.  Getting your fingers close enough to the needle to work with seam allowances that tiny is not for the faint of heart.

The next interesting part is the crazy pattern pieces.  I kid you not.  I am in awe of whichever genius however many hundred years ago dreamed up this system of hand coverings.

For those of you who've never seen a glove pattern before, here you go:

The top left piece is the thumb pattern.  It is folded in half and stitched along the top portion.  It is then sewn into the main piece (bottom right) into the hole you see cut out there.  That's right. It is sewn in circular sleeve style.  Very cool.  The bottom left pieces are the finger gussets -- those are the pieces that attach the top of the fingers to the bottoms (the palm side, so to speak) and each of them are a different length.  They definitely have to be matched perfectly, there is little room for error.

I started my sample glove using a heavy weight wool knit that I bought years ago.  It has a really strange surface, almost like melton, but very hairy and very stretchy.  I don't remember why I bought it (I'm sure I had a reason) and I almost didn't keep it (internet shopping can be so ... entertaining sometimes, and this piece was so not what I was expecting) but I hate to give up any piece of wool that comes my way.  Especially a wool knit.  Even if it is a little strange.

The fabric is thick, stretchy, and wool.  Sounds like gloves to me.

Cutting out the pieces accurately was the next challenge.  The fabric has such a springy surface that the pieces just did not want to hold still.  My pattern weights we too big for the gusset pieces (as you can see, they're not even an inch wide) and not heavy enough to really hold the pieces down properly.  I managed somehow (obviously) and got the first sample glove cut out.

Surprisingly, the instructions were rather straightforward and not that hard to follow (of course I've done this before with Green Pepper, so that probably gives me an advantage).  And like most of Butterick's instructions, I only followed most of them.  I didn't like their fingertip sewing technique -- it always seems like Butterick makes things more difficult to construct than they need to be.  I always read all the way through their instructions first, and take notes where I'm going to do my own thing.


Specifically, I attached the gussets to the top of the glove first, and then stitched the gusset to the bottom of the glove, stitching the two fingertip portions together, and then stitched down the next finger (after checking for the next finger's gusset alignment, of course).  Sound confusing?  It is.  Butterick's way was worse.  They had you stitch the fingertip portions together and then try to sew the gussets in.  Stupid.  If you're really interested, I can draw you a picture, but only if someone asks :o)

All that said, my sample glove was done in less than an hour.  And to my utter astonishment, it fit Youngest Son perfectly.  It looks like a big ole bear paw.  I love it!  Needless to say, I hurry up sewed the companion, hemmed them both, and counted the experiment a success.  I look forward to trying these again.  I'm pretty sure I can do a better job next time.


Wednesday, December 4, 2013

Twinkle Toes and Tshirts


Here's the wool socks and the fleece slippers, elegant aren't they?  They both have gotten a workout already.  Daughter wears the slippers every single day.  She's definitely going to need one or two new pair before this New England winter is over.

And Youngest Son's long sleeved tshirts are finally finished, too.  It's so hard to make interesting clothes for boys.  There just isn't that much variation in boys' clothing.  The pattern for all of these is Jalie 2918 Men's Tshirts.  A very nice, well-drafted pattern.  I used a size slightly bigger than his measurements, so a little room to grow.  I like the length on these.  Kid's shirts always seem to be too short for Youngest Son, but this pattern fits fantastic.

All the seams are serged, and the hems, sleeve hems, and necklines have all been coverstitched.  This is the technique I've been using to make t-shirts from time immemorial and I rarely have any trouble with it.  Occasionally one of the children will pull too hard on the hems or neck opening and pop the coverstitching.  It's pretty rare, so I haven't bothered to change the way I do things.  I guess if I really wanted to make them last, I'd put wooly nylon in the loopers.

This one on the left is a chocolate cotton/lycra -- probably from Fabric.com -- with organic cotton ribbing -- definitely from Fabric.com -- for the neckline.


The one on the right is brown organic cotton jersey with conventional organic green cotton jersey for the stripe and organic cotton rib knit for the neckline.


Here we have brown organic cotton ribbing and charcoal conventional cotton ribbing.  The color block seams really wanted to ripple on this one, but a session with my iron settled that rebellion.


The one on the left is a plain gray cotton ribbing.


This one on the right is camel and brown organic cotton jersey with brown organic cotton ribbing.


Not very exciting, I know, but sometimes the sewing just isn't that exciting.  I want to make a few Christmas gifts next, so those should be a little more interesting.


Wednesday, November 20, 2013

A Week in Plain Sewing

Sometimes you've just got to bite the bullet and do all that sewing you've been putting off because it's boring.  That was last weekend for me.  Several pairs of thermal pants and many, many t-shirts were at the top of the priority list, so I got out my trusty Jalie patterns, a pile of knit fabrics, and my 45mm rotary cutter and got started.

First I cut out thermal pants using Jalie 2328 Mens Thermal Underwear.  I think this is the very first pattern of Jalie's that I ever bought.  Oddly enough, I vaguely remember not liking it at first, but I can't for the life of me imagine why.  I was probably expecting something unrealistic.

In any event, this pattern gets my unqualified approval, regardless of my first impression (thereby proving that first impressions aren't always accurate, right?).  The tops fit well, the pants are well designed.  If you have men who work outside in the wintertime, and your winter is anything like New England's (or worse!) this is a great pattern to have. 

A really long time ago, I worked in a textile factory making, you guessed it, thermal underwear!  A before that I worked in a factory making, you guessed it again, long-sleeved knit shirts!  Um, so I've sewn pieces like these alot.  Like thousands of times.  So I feel like I'm a good judge of this kind of pattern.

I cut out three pair from some nice cotton thermal knit that I found at JoAnn's a few years ago.  Two of them are sewn and the last is waiting patiently to be assembled.

Assembly time: less than one-half hour.

After those, I started working on long sleeved tees for Youngest Son.  For these I chose Jalie 2918 Men's T-Shirts.  I haven't used this pattern at all yet, so I'm walking into unknown territory.  What I do know is that Jalie has been very reliable over the years, so I have no reason to expect disappointment. 

I started with the size that matched his measurements, but Youngest Son has got rather broad shoulders.  Made with a cotton rib knit, it fits in the chest, sleeve length is good, overall length is good, but the shoulders just don't quite fit.  I don't think it's the pattern though.  I think it's going to be a standard alteration on all patterns for Youngest Son.  This first tee is wearable, but it won't be long before he grows out of it.  I love how forgiving knits can be.

Next pattern tracing: Size up by 2 sizes to accommodate the shoulder broadness. 

Should have at least 3 or 4 of these tees finished by the end of the day.

So that's what I've been up to.  I do get tired of sewing practical items sometimes, but I get alot of satisfaction knowing that a great many pieces of my family's clothing have come from my hands.  That makes it all worth it.


Saturday, October 26, 2013

Progress on the Boys' Coat

The last week or so has been spent working on Youngest Son's new wool coat.  I'm using Burda 9533 again -- it's just such a nice pattern.  This will be the last time though, since it's the second largest size in the pattern.  I'm pretty sure by the time he needs another new coat, he'll be too big for the sizes in the envelope.

I'm working with a suit weight wool melton this time.  And since the insulation isn't in the shell fabric, I put it into the lining instead.  This jacket is lined with wool/nylon knit overall, with an extra layer of fleece in the fronts and backs.  Putting fleece in the sleeves made them too tight, so I just used the wool knit in those.  Who says you can't use a knit lining with a woven shell?  I've done it lots of times and never had any trouble.

It's mostly done, just buttons and buttonholes to go (I bet you know how I feel about those by now).  Pictures to come.

Aside from that, I got some pretty fabrics for Daughter for 3 more dresses, and I'd like to get a top or two done for myself, and a couple of shirts for the husband, and...oh, well, nevermind.  I'm really concentrating on knitting projects just now, so I'll have something to show you in that department soon, too.

I realize I also never showed you pictures of my own wool melton coat that I made this Spring with this Butterick pattern. I'll get right on that -- just as soon as I sew the buttons that just fell off back on. *sigh*

Saturday, June 15, 2013

Back in the Sewing (and Blogging) Saddle At Last

It's been a busy few months, but I'm finally getting some sewing done.  Last night I finished the shirt for my oldest son that's been hanging on my dress form waiting for buttonholes and buttons for about three months now.  I double stitched the mock flat-felled armhole seams, partly because in my first pass I didn't catch the folded over seam allowances in some spots and partly because I wanted it to look a little different from the other two I made in this fabric. This was the last of this nice yarn-dyed stretch shirting that made such beautiful dress shirts.  Ah, shucks, I'll have to do some more fabric shopping...


I also made a whole series of pants and tees for Youngest Son.  They're not very exciting, but sometimes practical sewing takes precedence over the fanciful stuff.  Youngest Son likes the cargo pockets on these, and always tells me to be sure to put them on.  I've got OOP Jalie 2107 -- Men and Boys Pants pattern.  I think I'm going to use that one for his next pair of pants.


Youngest Son's shirt series used up of alot of my knits in earth tones -- I'm going to have to do some more searching and buying in that department, too.  I've been making raglan tees for him, but this year I decided to trace out the regular tee from Kwik Sew's Sewing for Children book.  I sized down to get rid of the enormous '80's ease and lengthened for the proper fit.  They turned out very nice, though I see that, after a few washings, I'll need to reduce the length of the neckline ribbing.  I hate it when it bunches up at the inside edge of the curve.  It's truly amazing how shortening the ribbing by just 1/4 inch can make the neckline look so much better.

That's for the boys.  I've done some sewing for Daughter, too.  But I'll get to that next time.

Monday, February 4, 2013

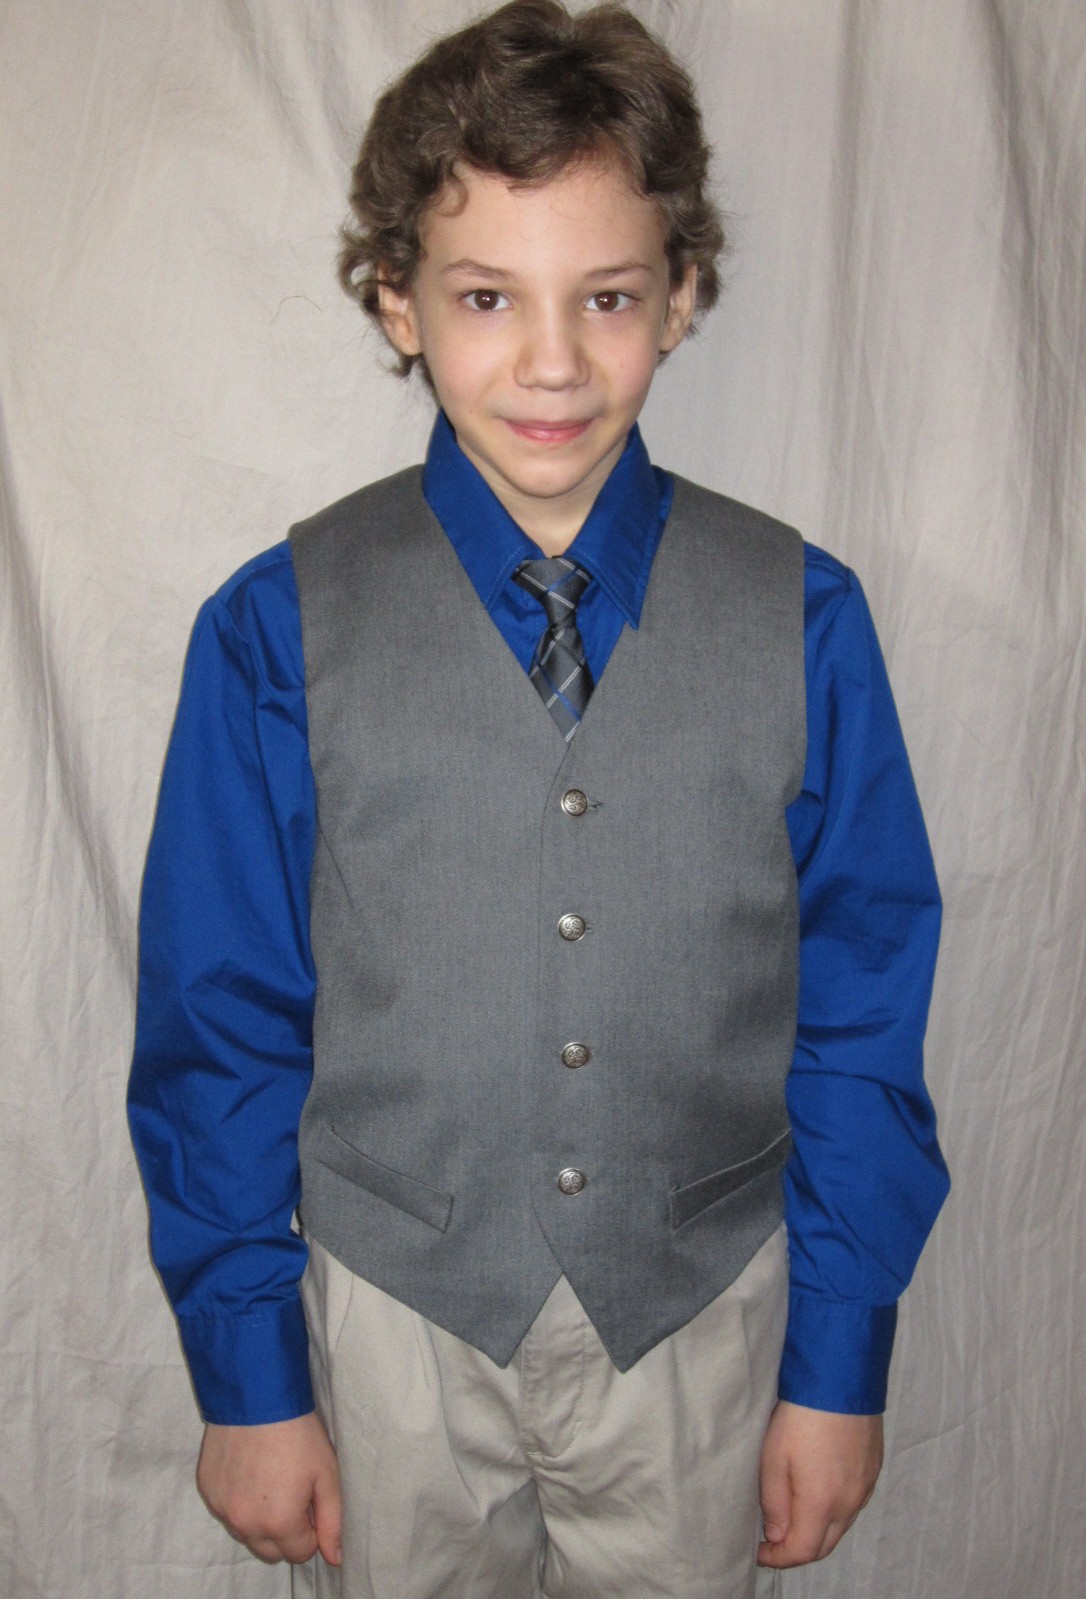
Kwik Sew 3399 -- Boys' Vest

I finished this one right around the first week of January, but I was so caught up in my contest entries for the One Pattern Many Looks Contest that I hadn't gotten around to taking a picture until now.

It's so hard to sew fun things for boys.  Oh, yes. Another shirt.  *sigh*  Oh, look.  Another pair of pants.  *sigh*  I've been searching for cool things that I can make for my guys, and the finding has been pretty darn slow.  But I am making progress, so hopefully you'll be seeing more guy stuff this year than I've been able to make in the past.

Here's the pattern envelope.  I bought this one many years ago to make trousers for my older boys when they were little, but this is the first time I've made the vest pattern.  This means that it's printed on the older, heavy white paper that I hear Kwik Sew isn't using anymore. 

I traced out the medium, and I was surprised to find separate pattern pieces for the lining and facings.   Actually, this vest has a pretty cool back neckline facing, which makes it pretty fancy looking on the inside.  It doesn't have real pockets, though, just the usual decorative pieces that look like they might be hiding a welt pocket but aren't.


The shell is a wool twill suiting, fairly lightweight.  The lining is a blue and black geometric jacquard of uncertain fiber content.  It's actually of a heavier weight than the wool, so it gives the vest some body that it wouldn't otherwise have.  The buttons are a solid metal that I got from an ebay seller from Quebec. 

The first version I made was pretty cute, but Youngest Son has the family long torso.  Which means the vest was too short.  After much consultation with his older brothers, we determined that his vest really needed to be about two inches longer. 

I added two inches to the body of the vest and came up with version two.  With the addition of the extra two inches, I needed to add another button to the front closure.  Somehow three just didn't look right, I think it violated the phi ratio or something.  But those were the only changes I made; shell fabric, lining fabric, and buttons were all the same as version one.

This was met with approval by all three brothers, and that is how the vest was won. 

Okay, that pun was totally cringe-worthy.  I apologize to everyone.

Now all he needs is a pair of gray trousers to go with the vest.  I still have lots of the gray wool and it is definitely soft enough to wear right against your skin, so I think I'll be adding the trousers from this pattern to my upcoming projects list.

Thursday, January 3, 2013

It's a Brand New Year--Boy's Wool Vest

I feel like I slept through the end of 2012.  I hope I was just resting up and preparing for an exciting 2013.

I always find that Christmas and New Year's disrupts my schedule so much that it takes me a couple of weeks to settle down and re-establish my routine.  I don't know how much sewing I'll manage, but I have every intention of sticking to my hour a day.

The first project of 2013 is this wool suiting vest for Youngest Son.  I had meant it to be the last one of 2012, but it didn't work out that way.  I made one, but Youngest Son apparently possesses the dreaded long torso that plagues the rest of us -- it was too short by about 2 inches.

The pattern is Kwik Sew 3399.  I've used this pattern for the trousers already, way back when either Jordan or Josh was young enough to fit in it. That would have been quite a while ago and I remember absolutely nothing about it -- other than that it happened, of course.

So, I've added 2 inches to the pattern length and recut all the pieces.  This is a nice, sharp vest pattern--looks good on both the inside and the out.  All the interfacings have been fused and much of the sewing has been done.  I really just need a couple of hours and it'll be done -- including the buttonholes.  If I don't get to it today, I'm confident I'll get it finished tomorrow.

Wednesday, February 15, 2012

Pictures of the Boy's Jacket

And some nice pictures of Youngest Son's Burda Wool Coat.  I love this coat.  I'm thinking about a version for me only more girl-looking.


He always wears it with the collar turned up to show the blue lining of the undercollar.


The back with its decorative leather loop.


The leather sleeve patches that are definitely not elbow patches.


Without a doubt, one very nice coat!

Monday, January 9, 2012

Boys' Jacket--Burda 9533


It's been a busy week, so it took me this long to find the time to sit at my computer and do the write-up for this project.  Here goes:


The pattern is for a semi-fitted boys' jacket or vest.  I made the jacket in a US size 9, European size 134.  The idea was to make him a classy jacket that would keep him warm in New England winter.  I think I achieved that.


The pattern calls for cotton, sweatshirting, gabardine, or corduroy as fabric suggestions, but I got all creative and used a toasty warm wool melton that I got from Fabric.com a couple of years ago.  Youngest Son picked a teal-ish Catalina shirting for the lining.  Not my first choice, but actually an excellent one.  He might have better taste than I do.


There's a number of really neat things about this pattern.  There is not only a back yoke (that's used for shaping), there's also a front yoke (as a design detail.  Two extra seams, but it's very nice-looking.

The patch pockets and pocket flaps are lined with the lining fabric.  Very cool.  I imagine it wouldn't be that difficult to do self-lined pocket flaps if I were doing this in a lighter weight fabric, but for the melton, this idea is downright brilliant. 

My topstitching of the patch pockets could be better, but as they say, it passes the 20 mile an hour test.

The undercollar is also of the lining fabric.  Seriously, I love the idea of using a cool lining fabric and then also using it to accent the fashion fabric.  Especially with boys' clothes.  It's always so hard to make them stuff that isn't boring.

The knit cuffs are also an interesting design feature.  They are attached to the lining first and then attached to the sleeve.  Made with ribbing, they stretch to fit over gloves.  If I make this one again (a distinct possibility as either a light jacket in Spring or another winter coat next year or maybe even both) I will make the cuffs a little smaller so they're a bit more snug around the wrists.


The sleeve patches are a bit odd, though.  I originally thought they were elbow patches, but the placement diagram on the pattern pieces puts them on the outside of the arm.


I think they're just supposed to be decoration.  I used black sheepskin leather for the patches, just topstitched along the edge with a leather needle in my treadle machine.


I used another piece of leather for the loop at center back.


The pattern calls for only three buttons, as the jacket is supposed to have lapels and a roll line.


However, for warmth, it really needs a top button.  So I placed a top button and slightly adjusted the placement for the rest of the buttons.

Hmmm.  Doesn't look as good buttoned all the way up, but if it's that cold out, looks is a secondary consideration.


I left out the shoulder pads as they seemed unnecessary, but I would include them in a Spring version.  They would definitely lend a tailored look to a jacket that already looks pretty sharp.


This is a really nice pattern.  Technically, it is very well drafted.  All the notches fit, the sleeve cap has a perfect amount of ease, the proportions are just right, and it fits nicely.  Highly recommended.

Saturday, December 31, 2011

Burda 9533 -- Boys' Jacket Finished!

Woo Hoo!  I did it!  I finished Youngest Son's jacket before the turn of the New Year!

With just hours to spare, I got this awesome jacket all but finished -- finished, that is, if you don't count the buttons and buttonholes.  And I don't.

I'll work on those later tonight if I have time, or tomorrow if I don't.  And I'll write up a complete review tomorrow, too.  This was a great project and I have a lot to say about this pattern.  I'll also add better pictures than smooshed flat lying on the table, too, with detailed shots of the leather patches, the leather loop on the back, the lining, the neat cuff details, and whatever else I can think of between now and then.

This means I can start the New Year with a new project list...hmmm where will I start?

And oh.  Happy New Year, Everybody!!!

Wednesday, December 28, 2011

Progress on the Boys' Coat--Pattern Traced

It's been a little tough to find sewing time so far this week, but I did manage to get the pattern completely traced out.  I had to spend some time reading the instructions, too, in order to be completely sure how many pieces were intended to be cut from both fabric and lining--somehow I found the markings on the pattern pieces to be a little obscure.  Maybe it's just that I'm not used to Burda patterns.

At any rate, all the pieces are traced and marked (correctly, I hope).   I washed, dried, and folded the lining fabric today, which is actually a really nice yarn-dyed Catalina shirting.  It wouldn't be my ideal choice of lining but it is the one that Youngest Son picked. 

I still have to choose a ribbing for the sleeves.  Interestingly enough, the ribbing cuffs are attached to the lining, not the actual sleeves, so that the jacket cuffs are close against the wrists for insulation but aren't actually visible.  The patch pockets and flaps are actually lined.  This is also the first kids' coat pattern I've seen that calls for shoulder pads. 

The more I see, the more I like it.  We're talking uber-classy coat here.  I'm even thinking about using leather for the elbow patches.  Black leather on the gray melton would look really cool.

Monday, December 26, 2011

Last Project of the Year

Hope you all had a fine day yesterday, full of good cheer (or at least good food!).

My final project for the year 2011 is going to be a Burda envelope pattern.  Burda Kids 9533 is a coat and vest pattern with an optional hood, back yoke and center back seam. 

I was actually looking for something along the lines of a double breasted pea-coat, but this was the closest I could find.

I'll be making this without the hood, as I plan to make the jacket with wool melton.  Youngest Son has already picked out his lining fabric -- a nice teal Catalina shirting from Fabric.com.    I need to pop that into the washing machine to preshrink it -- something I'll probably get to this morning so it'll be ready to cut today.

The nice thing about Burda envelope patterns is that they're not as complicated as the magazine patterns for tracing out, though I don't like the flimsy paper, and of course they already have seam and hem allowances.

The downside: the one and only Burda envelope pattern I've used before was also a kids pattern -- for pants.  They were cool, too, and both Oldest Sons wore them.  They were crazy to make, though, because important pattern pieces were missing or weirdly drafted.

Cross my fingers that the jacket goes together better than the pants did. 

I'm hoping to make a bunch of things from the couple of Burda magazines I've bought through the classifieds on PatternReview -- I discovered that I can order a subscription through Amazon and I want to see if that's really want I want to do.  90 bucks for a year of patterns is such a great deal...but only if I like them.  I know I like European styling, but I'm not sure I'm going to enjoy that whole tracing, adding seam allowance, crazy Burda instruction thing.  I know people who can read German, French, and Spanish, though, and would be willing to translate for me.  Are the instructions any better in one of those languages?

Monday, December 12, 2011

Getting My Enthusiasm Back!

It's been a couple of weeks since I've gotten really excited about any of my projects, but I think that's finally coming to an end.

Yesterday, I spent alot of the day sewing and got one pending project finished and another one started.

The pending project was a pair of pants for my youngest son.  I've been pushing the pieces around since September, when I cut out a whole bunch of pants for him in different colors (like black, brown, olive, and tan) and I made up all the pairs but one.  That last pair, I finally cut out and assembled cargo pockets for them and put that pair together. 


The project I started was a button-down shirt for my husband.  I got the most beautiful lightweight canvas from FabricMart last week in a chocolate brown.  One side is brushed so it is almost flannelly and soft and the other side is a nice, practical plain weave.  It is very high quality, gorgeous stuff and I'm am so glad I bought 8 yards of the stuff (mostly because I want to use it to make a pair of pants for ME!).

I am using Jalie 2111 to make this shirt.  I've made it several times already in different sizes, so I'm familiar with the pattern, though last night, for some reason, I couldn't get the collar to fit into the neckline.  Not sure what I was doing wrong, but I always take it as a sign to quit sewing when simple operations become too difficult for me to execute.

It may have been some of the alterations I made to the pattern, so I'll have to check on that today.  I eliminated the back yoke and I changed the shape of the collar, so I might've made a mistake in there somewhere.  Or maybe I just got too tired to sew last night.


By the way, I love Jalie's sleeve plackets.  They look totally classy on the front...


And just as classy on the back.

I've taken to using these sleeve plackets no matter which shirt pattern I'm using, I like them so much.


So, I got the pieces cut out and the front bands, sleeve plackets, and shoulder seams sewn.  Not bad for a project I only started yesterday.  What's left?

I need to cut, interface, and sew a new collar first.  Then put the rest of the shirt together and then comes the really hard part:  choosing the perfect buttons.

Sunday, September 25, 2011

Sewing For Kids Boys Pants


I spent the last couple of days sewing pants for my youngest son. The pattern is an ancient New Look 6853 that I bought a number of years ago, but it is now out of print and the number 6853 is assigned to a women's pattern.
The gray ones are a nice heavyweight stretch twill, perfect for winter.   The olive green are a slightly lighter weight, but a very nice 100% cotton twill.  I drafted and added some expanding cargo pockets to the green ones, which I'm sure my son will love.
Click the pic to see the pocket better


This pants pattern is delightfully simple if you want a pattern that is pretty quick to pop together and you have kids that like an elastic waist.  The front pockets aren't super deep, but they are adequate for a few matchbox cars or army guys.

I have two more versions of these pants cut out for my son, a pair in black and a pair in brown.  I hope to get them finished before the day is done.  Then he'll have four new pairs of pants and I can get started on making something for me :-)

Monday, August 29, 2011

Sewing For Kids -- Tshirts Assembly Line Style

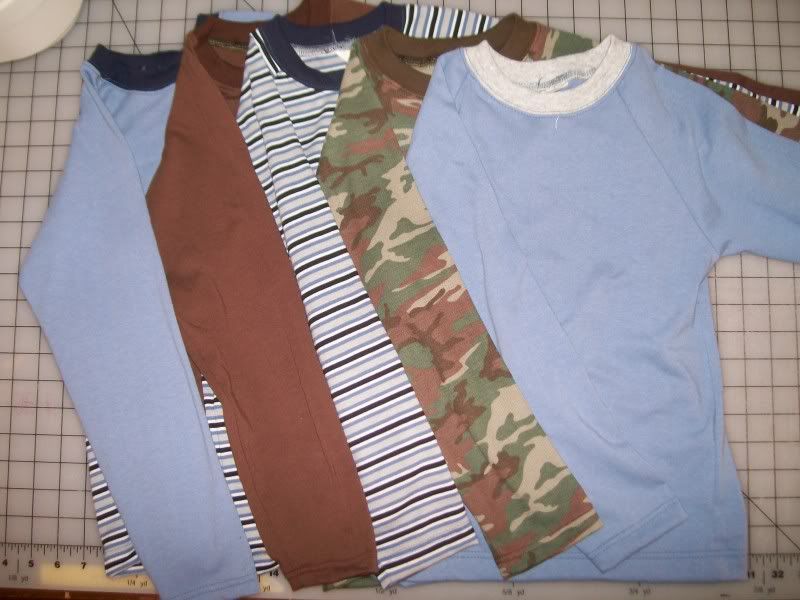
Five Kwik Sew 2894 long sleeved tees for my youngest son.  The striped fabric came from Fabric.com a couple of years ago--I've been making shirts for my son with the many yards I bought.  This is finally the last of it.  A good thing, since I think he's rather tired of blue striped shirts.  The slate blue jersey I bought from eBay about 5 years ago--it was my first purchase of a bolt of fabric.  I never realized just how many garments you can make with ten yards of fabric. The brown and the camo also came from Fabric.com--the organic jerseys make nice tees for adults, too.

Anyway, they're all finished, hemmed and ready to wear.    I like these raglan tees and I've been using this pattern for quite some time. What I like most is that they are, except for the hems, completely serged.  And if you put cuffs on the sleeves, only the bottom needs to be hemmed.

Now, though, I'm finally ready to get to work on that Fringe Festival Top.

Saturday, August 27, 2011

Practical Sewing and Hurricane Delay

I had planned to make the Fringe Festival top this past weekend, but practical sewing got in my way.  It seems that Mother Nature decided to give us a cooler late summer this year, so I started making fall clothes for the kids.  Instead of cutting out my own top, I ended up spending my sewing time cutting out some long sleeve tees for my youngest son.

I use Kwik Sew 2894 to make kids' raglan tees.  I've been using this pattern for quite some time and I'm always pleased with the results.  The only thing that I have to change is that I always, no matter the size, shorten the pattern piece for the neckline ribbing.  Usually it's just 1/4 inch or so (for a full 1/2 inch shorter neckline binding), but sometimes it's a hair more.  I found that this makes the neckline binding lay flat against the neck and is much less likely to stretch out with time.

Assembly line style, I cut out one of brown organic jersey, one of slate blue jersey, one of slate blue and navy striped jersey, one that I color blocked using the two blues, and one of green and brown camouflage in thermal knit.  I have lots of different ribbing in my stash, so it's usually just a matter of picking the one that's the closest color match or using  a contrast color for a "ringer tee".

When it came time for sewing, I sewed the camo and the brown first and then changed serger thread for the three blue ones.  Four shirts with only a single thread change. I love efficiency.

But wait! That's only four.  What happened to the fifth one?

Naturally, I discovered (after putting all the fabric and pattern pieces away, of course) that for the blue jersey I cut out two shirt fronts instead of a front and a back--it couldn't be two backs, couldn't it?  Where I could just recut the neckline?  Noooo. It had to be two fronts. So now I will need to pull out the leftover blue jersey and cut another shirt back.  And since I hate wasting cut pattern pieces, I will have to cut another back and sleeves to use up that spare front. Not very efficient.  I'm afraid the two cancel each other out. 

But it will be six shirts with only one thread change.  That's not so bad.  And my son will have all the shirts he needs for a while.

Mother Nature also decided to send a hurricane our way...or perhaps by the time it gets to my little corner of New England it will simply be a tropical storm or a tropical depression.  I am expecting the electricity to be out for at least a little while, but if it isn't, I'm hoping to get that Fringe Festival top cut out tomorrow.  I don't (yet) have a treadle machine, though I learned (a million years ago it must be now) how to sew on one.  When I have a bigger sewing space, I expect to put one in the place of honor just as soon as I can get my greedy little paws on a old Singer like my mother's.  So the electricity can go out all it wants...I'll still be able to sew.